Online Instance
A public instance of agent directory is available at https://hub.agntcy.org/. In this section we describe the main features of this instance which is provided AS IS to the community as a non production environment to familiarize with agent directory. In this section we will use the name hub to indicate hub.agntcy.org.
Hub is designed to provide a robust multi-organization platform for hosting and managing agent repositories. Its primary aim is to deliver a hub-like user experience, offering easy navigation and management for users. Hub acts as a centralized point for organizing and accessing agent repositories. This service is enhanced by a gRPC API that supports efficient service communication and integration, ensuring seamless interaction between components.
Hub serves as the central platform for hosting and managing various agent-related services. The main purpose is to provide a comprehensive solution for developers and IT admins to register, discover, and manage agents in an organized manner. By offering a secure environment for authentication and user management, it ensures that organizations can confidently manage their agent directories and related services.
Features
Hub enables users to:
View and search for public agent repositories.
Create repositories.
Publish records.
Access multiple separate organizations.
Using the Hub
Signing up for the Hub and Logging in
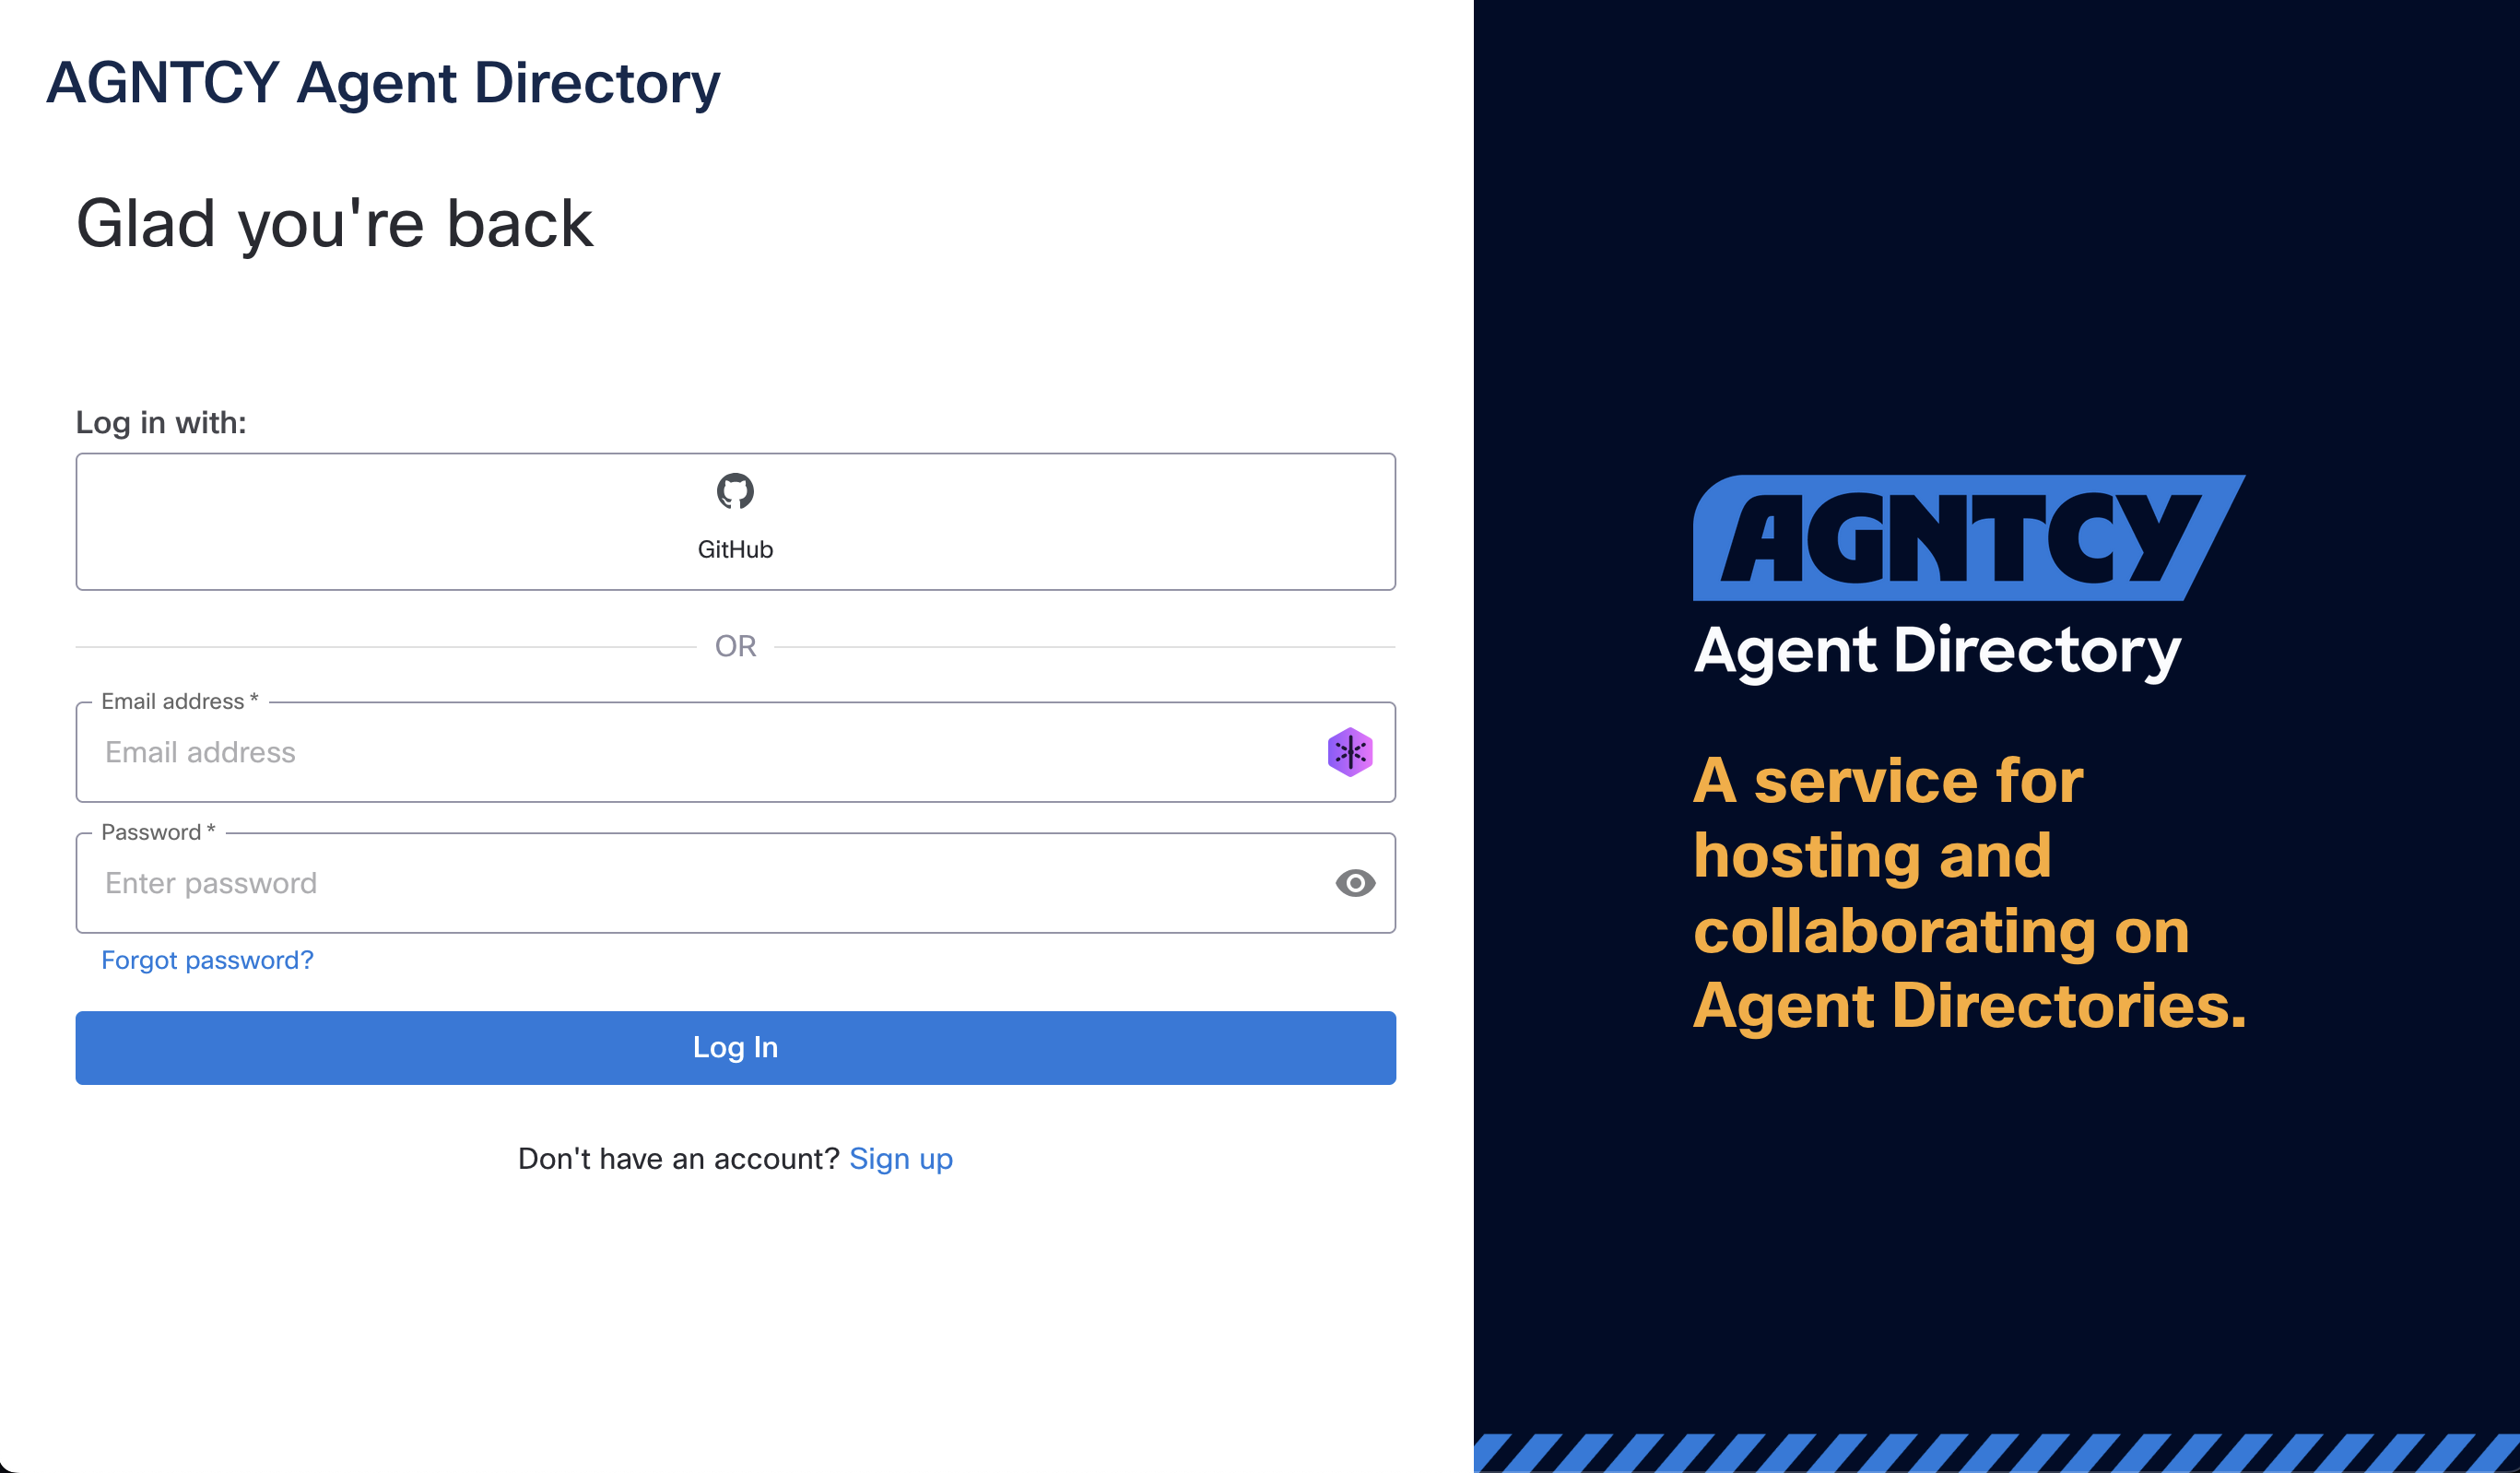
To get started with the hub, sign up for free at the AGNCTY Agent Directory homepage. You can sign up with your GitHub account or by providing an email and password. Once your account is created, simply log in. When first logging in, you are prompted to create a name for your default organization. This organization is a personal space where all repositories belong to you.
Explore Page
“The Explore page allows users to browse and search through available agent repositories.
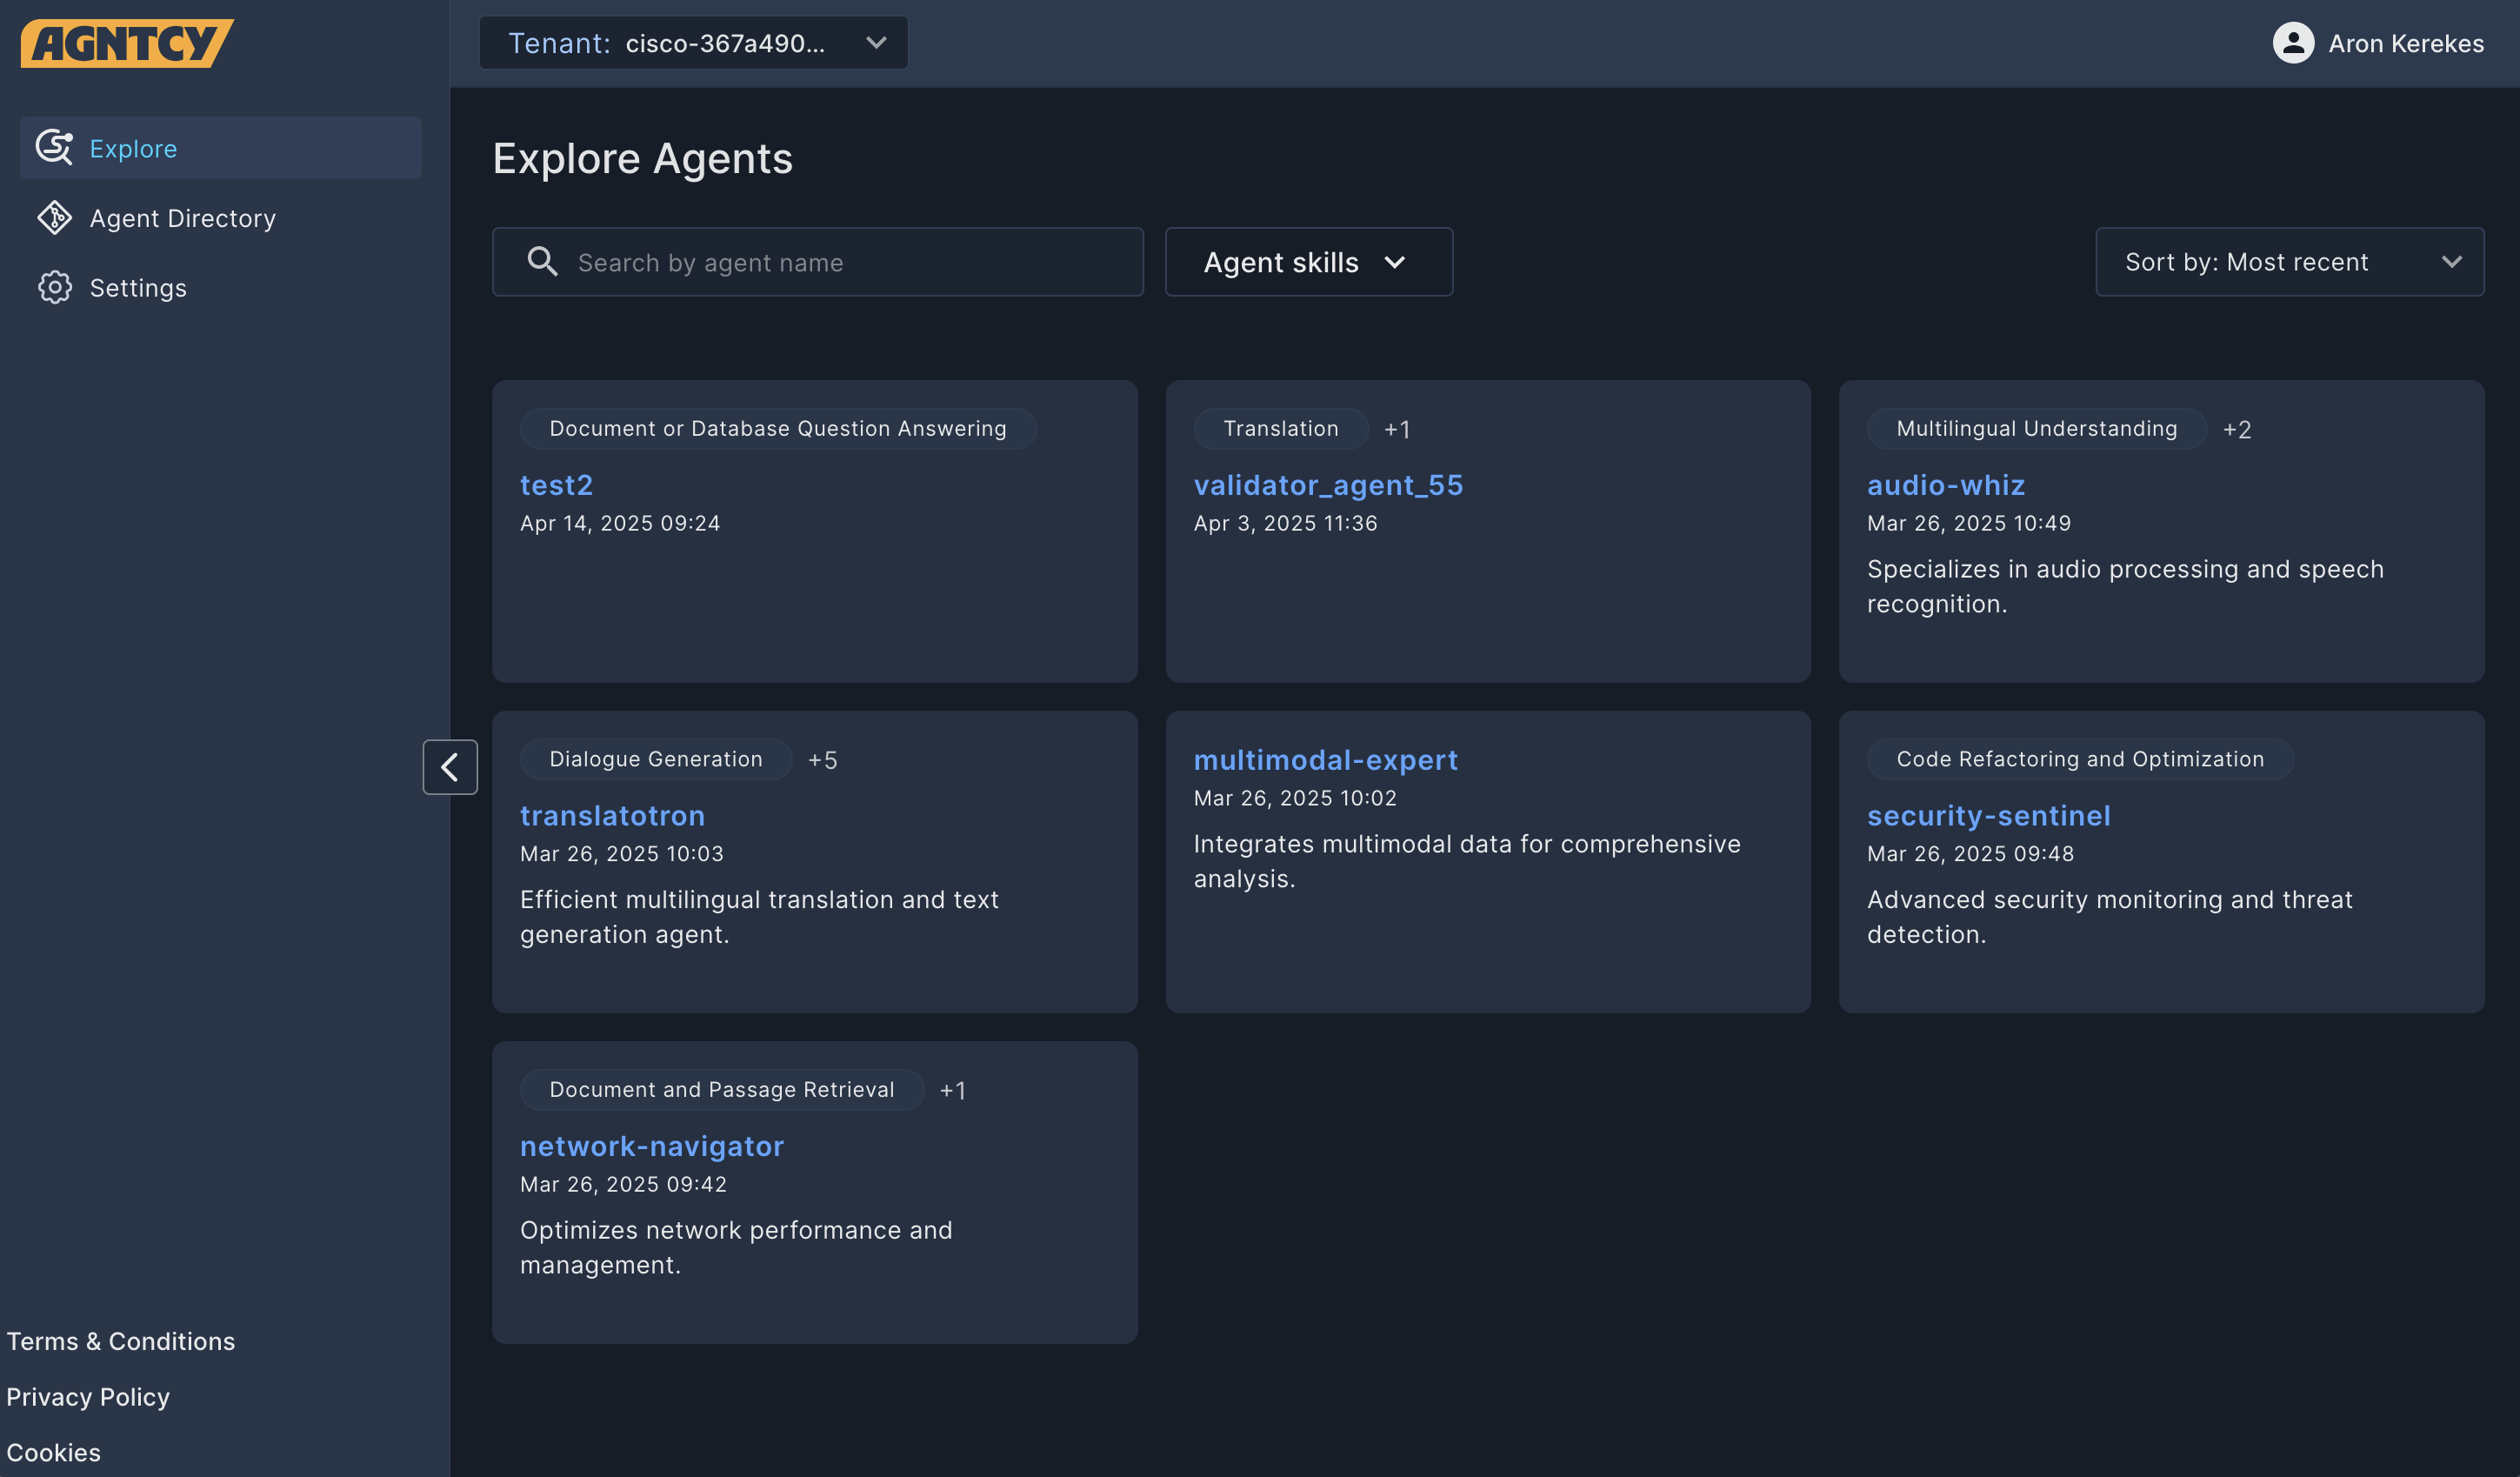
You can refine the results using predefined filters and open search:
Use the Search bar to search for a text string in a repository name. To clear the search bar, click the ×.
Use the drop-down Filters list to narrow the results by Agent Skill.
Use the drop-down Sort by list to sort the displayed items by Most Recent or Oldest.
You can change organizations by clicking the Org drop-down list and selecting another organization.
Agent Details
Clicking on an agent repository opens the Agent Details page with further information on the agent repository.
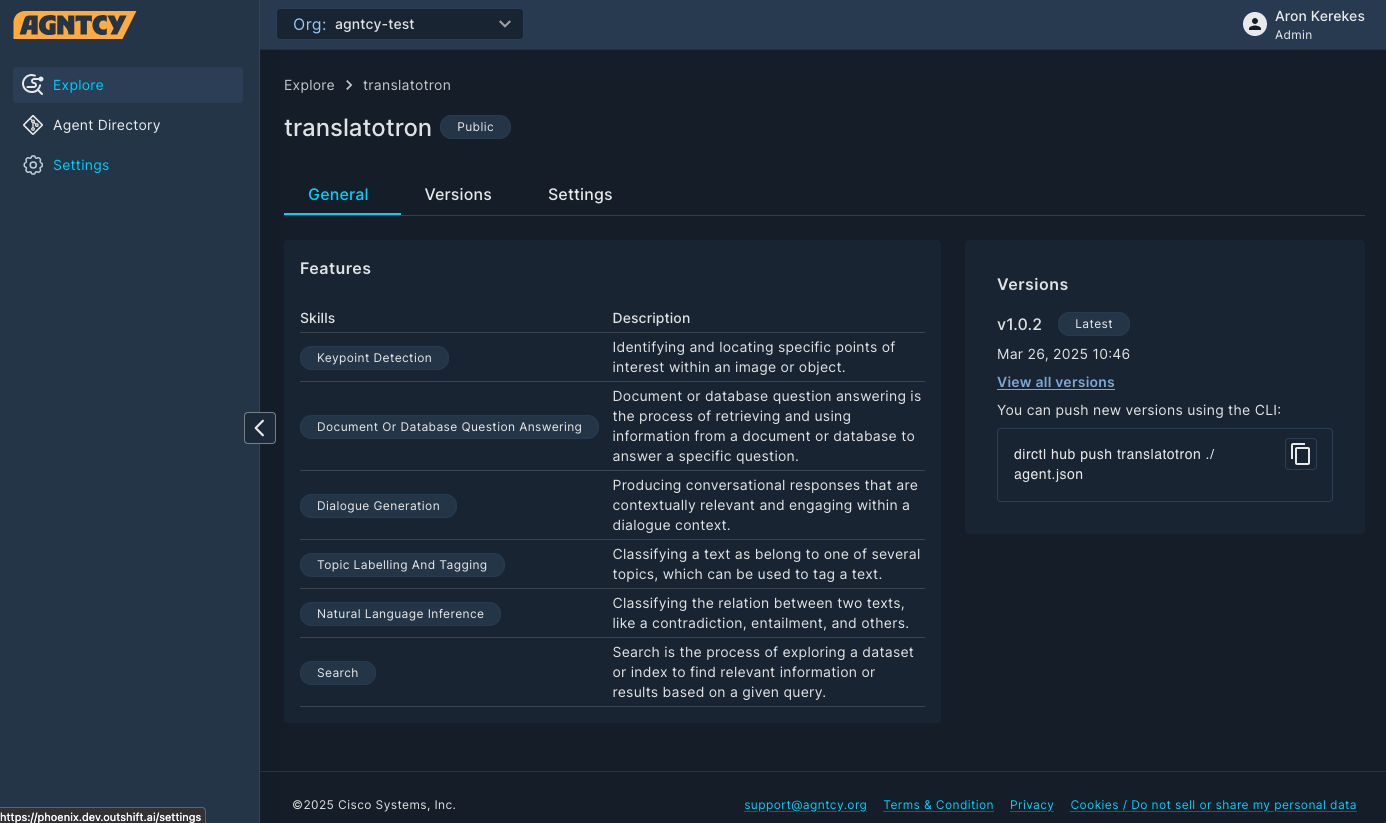
The General tab lists the following information:
A description of the agent.
The creator of the agent.
The skills associated with the agent.
The version number and date of publishing.
The CLI command to pull the agent’s directory.
The Versions tab lists the published versions of the agent.
The Settings tab allows the owner to change the description and the visibility of the agent.
Agent Directory Page
The Agent Directory Page allows you to view, edit, and create agent repositories in the Hub. Here the records are displayed in a table with customizable columns.
You can select which columns are displayed, and in which order, by clicking the Arrange Columns button (▥).
You can reload the listed items by clicking the Reload button (⟳).
You can refine the results using predefined filters and open search:
Use the Search bar to search for a text string in an agent repository name. To clear the search, click the ×.
Use the drop-down Filters list to narrow the results by Agent Skill.
Use the drop-down Sort by list to sort the displayed items by Most Recent or Oldest.
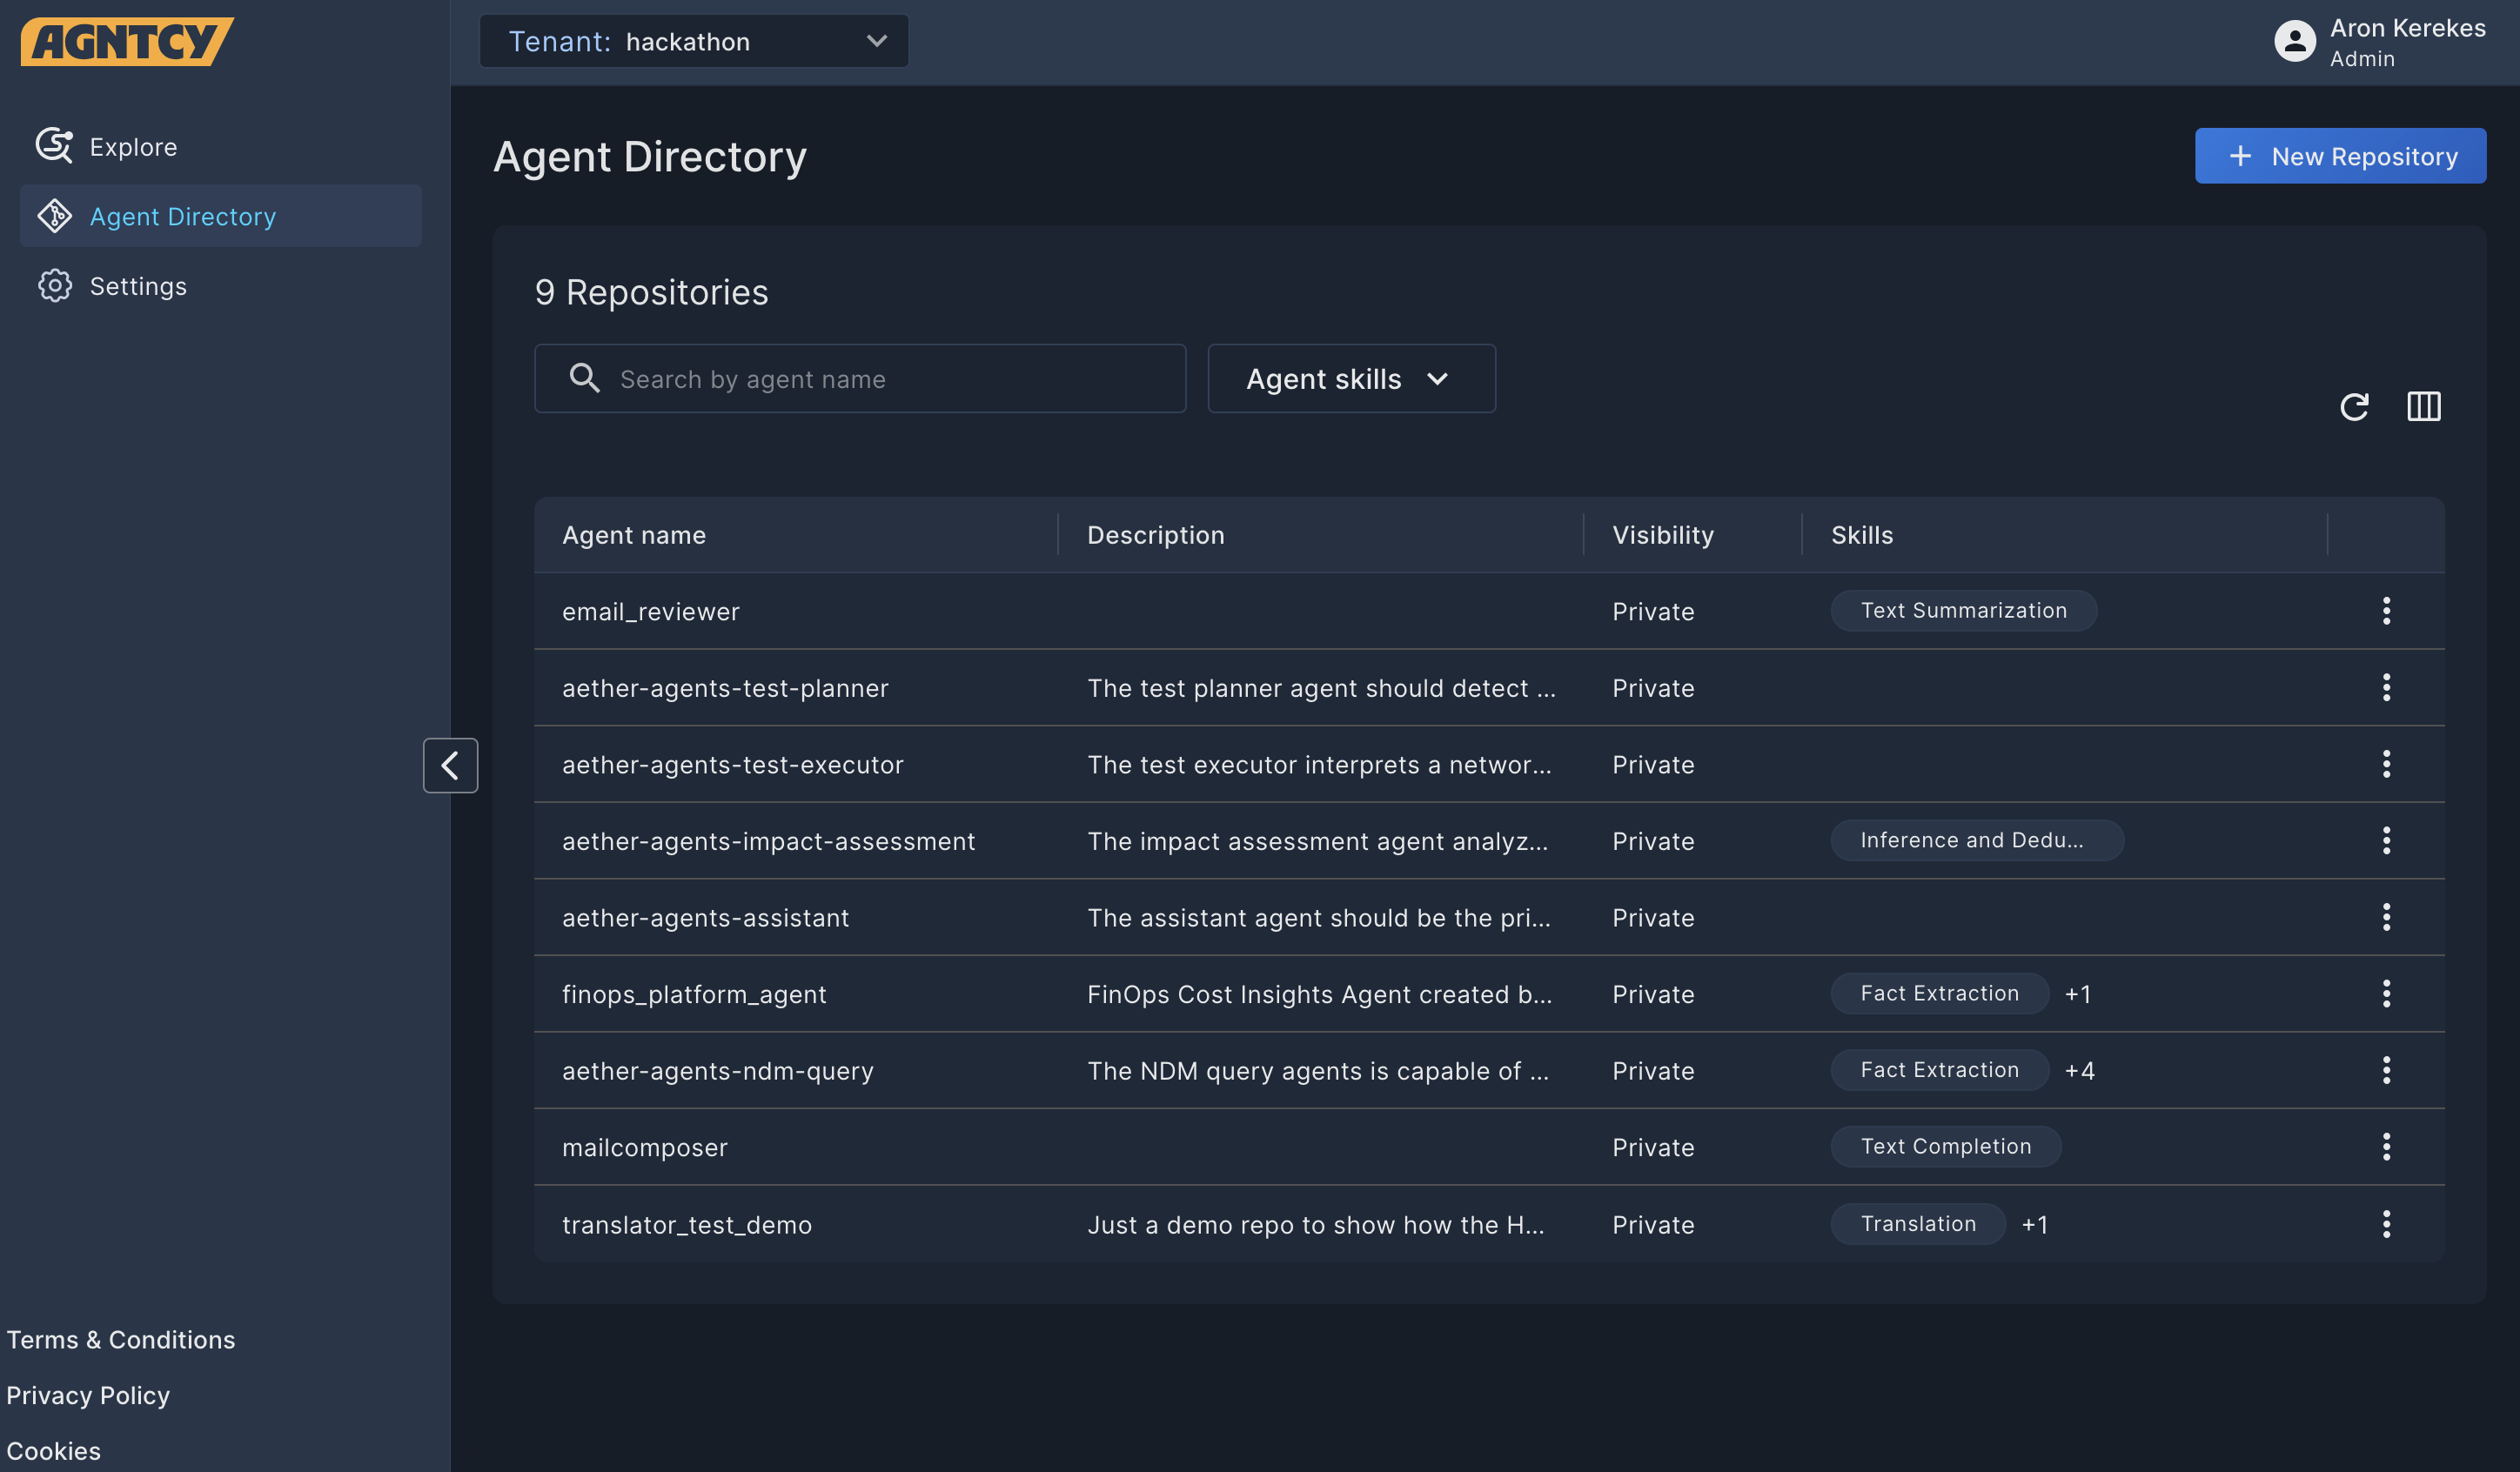
Agent Actions
Clicking the three dots (⁝) at the end of any record in the Agent Directory table opens a drop-down list of actions you can perform on that agent repository.
Click Open Details to view the agent.
Click Edit to edit the agent.
Click Delete to delete the agent.
Create
To list an agent in the Hub:
Click the + New Repository button.
Enter the repository name and description.
Select the visibility for your agent repository.
Public agent repositories appear in search results.
Private agent repositories are only visible in your organization.
Click Publish.
You can also publish the agent repository using the generated CLI command.
Click Finish.
Your agent repository is created in the Hub.
Settings
The settings page allows you to manage your organizations and users.
Organizations
Organizations represent separate spaces or organizations within the Hub, each with its own repositories and users. The organizations available to you are listed under the Organizations tab.
Clicking the three dots (⁝) at the end of any record in opens a drop-down list of actions you can perform on that organization.
Click Edit to edit the organization.
Click Delete to delete the organization.
Click Switch to switch to the organization.
You can reload the listed items by clicking the Reload button (⟳).
Users
The users in a organization are listed under the Users tab.
You can invite other users to the organization by clicking the + Invite User button.
Note: You cannot invite other users to your personal organization created during signing up. To collaborate with others, create a new organization.
Clicking the three dots (⁝) at the end of any record in opens a drop-down list of actions you can perform on that organization.
Click Edit to edit the user’s role.
Click Delete to delete the user.
You can reload the listed items by clicking the Reload button (⟳).
Using the Hub through CLI
You can use the Hub through the CLI.
Use the dirctl hub command to list the available commands.
Initialize the Repository
In order to start with the process, an agent.json object needs to be created.
This can be done by initializing local code repo using:
dirctl init repo
Logging in
Use the dirctl hub login command to log in. The login page opens in your
browser. Use your credentials to log in.
Listing Organizations
Use the dirctl hub orgs command to list the organizations you are a member of.
Signing Agent Data Models
You must sign the agent data models before pushing to Hub. Unsigned models are rejected by the API.
To sign an agent data model using identity-based OIDC signing, run dirctl sign ./agent.json.
Pushing and Pulling Agent Data Models
To pull the data model, use the dirctl hub pull <org>/<repo>:<version>
command. Alternatively, you can use dirctl hub pull <digest> instead.
To push the data model, use the dirctl hub push <org>/<repo> ./agent.json command.
Verifying Agent Data Model Signature
The verification process allows validation of the agent data model signature against a specific identity.
To verify that an agent data model is properly signed, you can run dirctl verify ./agent.json.
To verify the signature against a specific identity, for example to check if an agent model originates from GitHub Agntcy users, run:
dirctl verify ./agent.json \
                 --oidc-issuer "(.*)github.com(.*)" \
                 --oidc-identity "(.*)@agntcy.com"