Creating Agentic Service Identities
This guide outlines the process of creating and registering Agentic Services within the AGNTCY Identity Service, which involves establishing a unique identity for your service and subsequently issuing a badge for its discovery.
1. Create Agentic Service (Identity Creation)
The first step involves defining your Agentic Service, which automatically creates an identity for it using the Identity Provider and assigns a unique API Key. This API Key is crucial for subsequent operations and authentication.
Steps:
- Navigate to Agentic Services in the left-hand menu.
- Click on Create Agentic Service.
- Select Agentic Service Type & Source:
- Choose the appropriate type for your service:
- OASF: For Open Agent Schema defined services.
- MCP Server: For services running on an MCP (Model Context Protocol) Server. (As shown in the screenshot, this is the selected option.)
- A2A Protocol: For Application-to-Application protocol services.
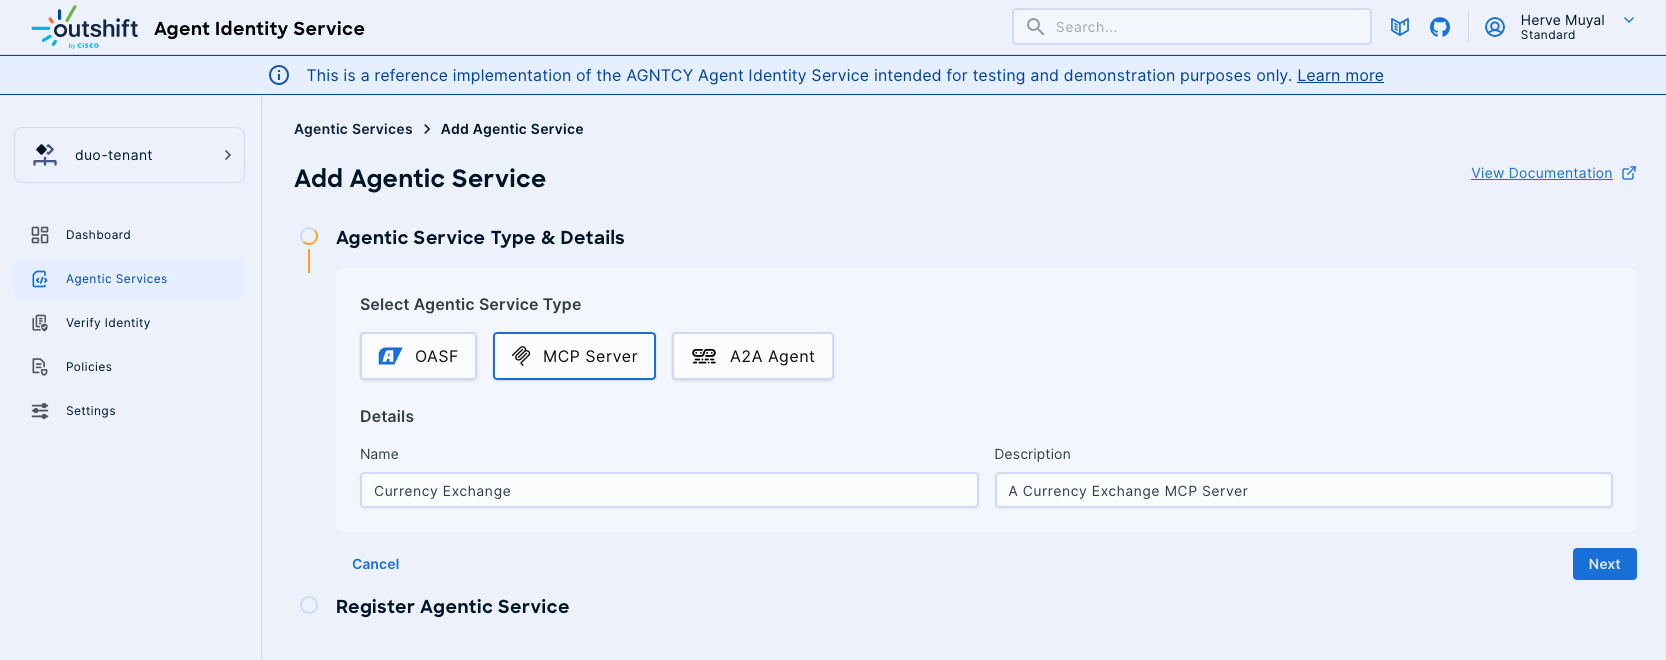
- Details:
- Name: Enter a descriptive name for your Agentic Service (e.g., "Currency Exchange MCP Server"). This name will help you identify the service within the platform.
- Description: Provide a brief explanation of your service's purpose (e.g., "A Currency Exchange MCP Server").
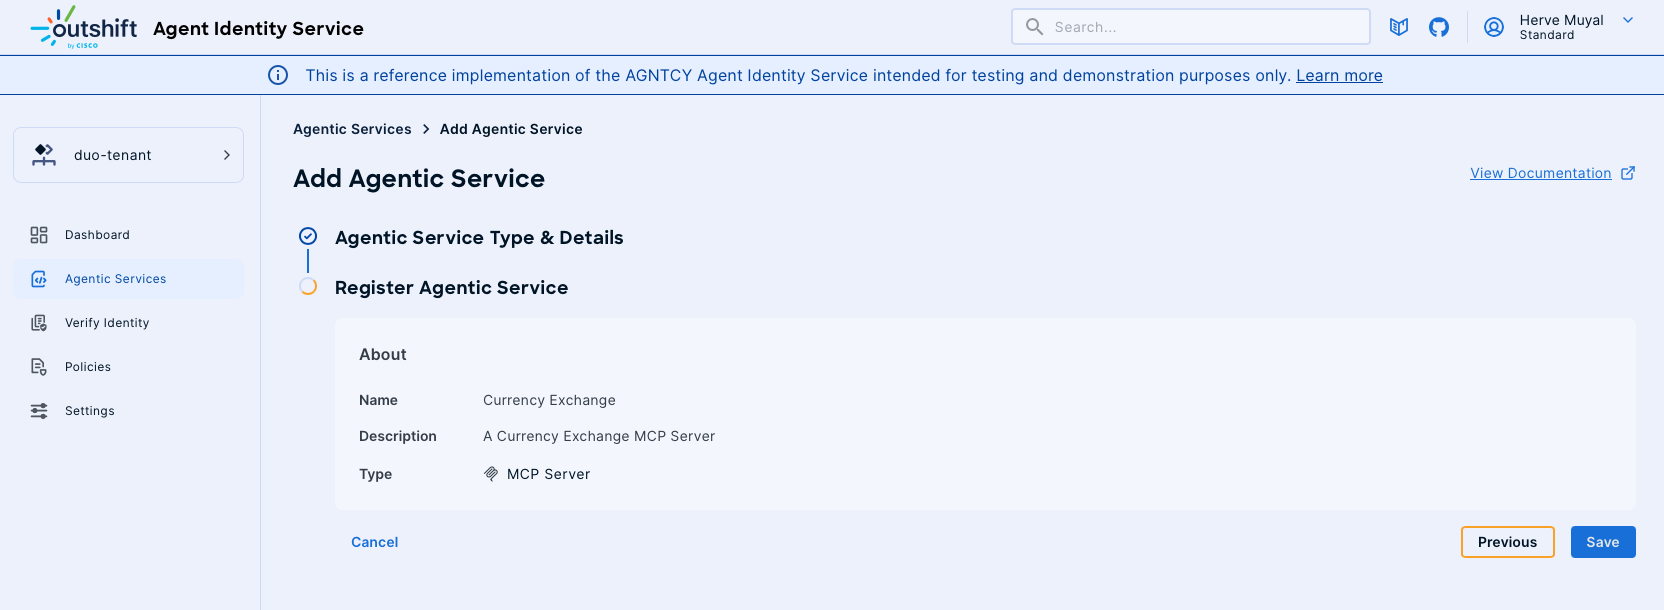
- Click Next to proceed. Upon creation, an API Key will be generated for your Agentic Service. Ensure you securely store this API Key, as it will be required for issuing the badge.
![]()
2. Issuing the Badge
Issuing a badge enables the discovery of your Agentic Service, whether it's an MCP Server tool or an A2A Agent's well-known Agent Card. The method for issuing the badge depends on whether your service is accessible from the internet.
A. Service Accessible from the Internet
If your Agentic Service can be accessed directly from the public internet, you can provide its deployment URL for online discovery.
Steps:
- During the "Register Agentic Service" step, you will be prompted to provide the Deployment URL for your service.
- Enter the full URL where your service is hosted and accessible.
- The service will then perform online discovery using this URL.
![]()
B. Service Not Accessible from the Internet (Including Localhost and Development Deployments)
For services that are not directly accessible from the public internet (e.g., services running on localhost, private networks, or development environments), you can use the Python SDK to issue the badge.
Steps:
- Install the Python SDK:
- Ensure you have the Python SDK installed. Refer to the SDK section of the documentation for detailed installation instructions.
- Perform the Badge Creation Command:
- Open your terminal or command prompt.
- Execute the following command:
Replace
identity-cli badge create {URL}{URL}with the local or internal URL of your Agentic Service. - You will then be prompted to provide the Agentic Service API Key that was generated during the "Create Agentic Service" step. Enter the API Key when requested.
![]()
This command will facilitate the offline registration and badge issuance for your Agentic Service.
Once the badge is successfully issued, it will be associated with your Agentic Service, allowing it to be discovered and utilized. You can view the details of your newly created Agentic Service, including its API Key and badge status, in the Agentic Services dashboard:
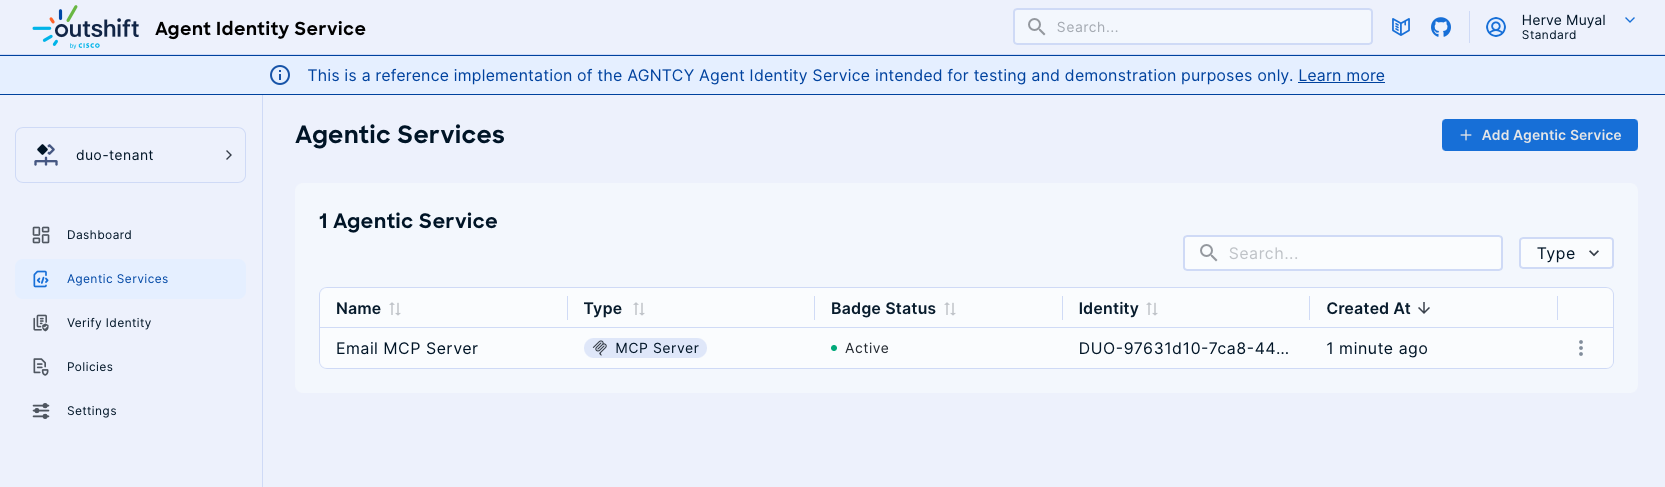
And the details of the Agentic Service you just created:
![]()
3. Policies Associated to An Agentic Service
Located at the top right corner of the details screen of an Agentic Service, two tabs called "Policies Assigned" and "Policies Used By" allow you to see which Policies are currently assigned to the Agentic Service and which policies from this Agentic Service may be used by other Agentic Services respectively.
Policies Assigned
The Policies Assigned tab provides an overview of the policies that are currently assigned to a specific agent service, such as the emailMCPServer. This section displays essential information including:
- Policy Name: The name of the policy, such as "Invoke Policy".
- Rules: The specific rule(s) associated with each policy.
- Assigned To: Indicates the agent or service to which the policy is assigned, such as emailMCPServer.
- Updated At & Created At: Timestamp details indicating when the policy was last updated or created.
- Action & Needs Approval: Shows the allowed actions and whether approval is required or not.
![]()
Policies Used By
The Policies Used By tab provides an overview of the policies used by the agent service. This section displays essential information including:
- Policy Name: The name of the policy, such as "Invoke Policy".
- Rules: The specific rule(s) associated with each policy.
- Assigned To: Indicates the agent or service to which the policy is assigned, such as emailMCPServer.
- Updated At & Created At: Timestamp details indicating when the policy was last updated or created.
- Action & Needs Approval: Shows the allowed actions and whether approval is required or not.
![]()