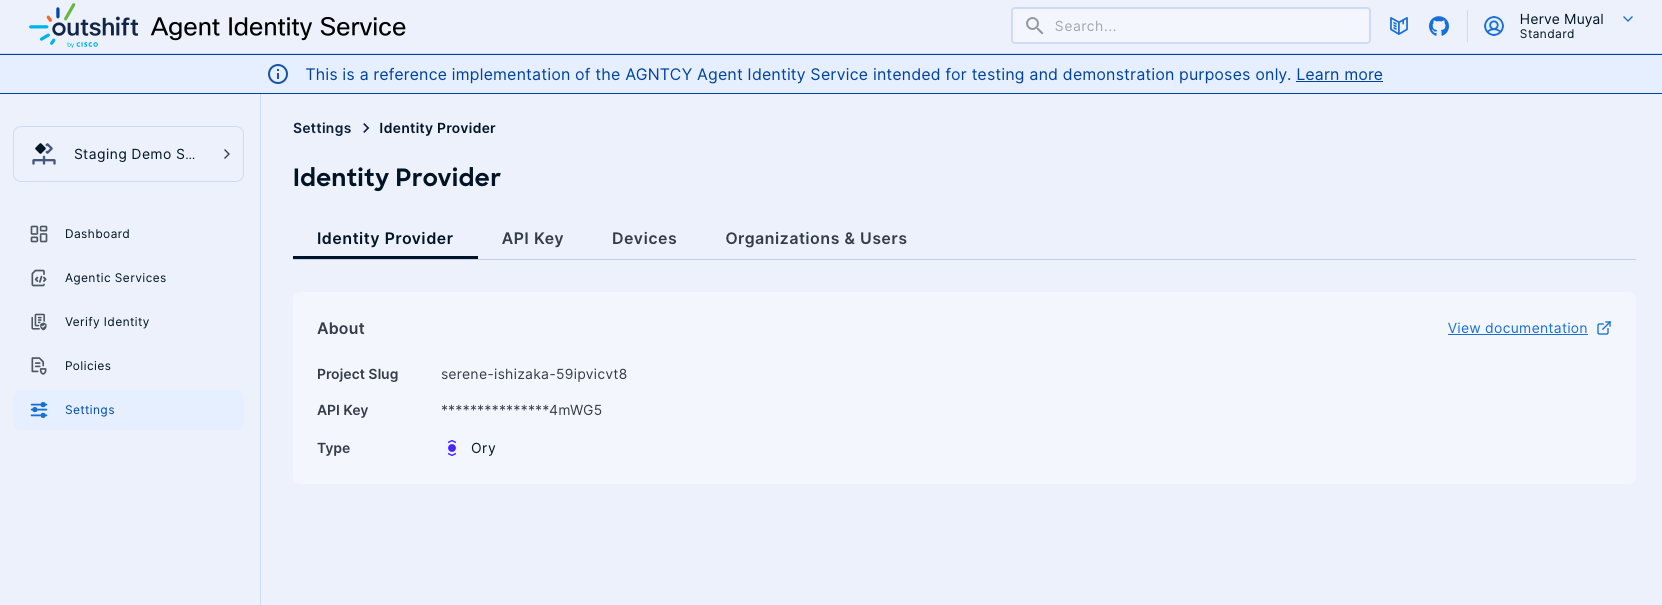
Settings
Welcome to the "Settings" section of the Agntcy AGNTCY Identity Service. This section provides a comprehensive guide to managing critical configurations, including API Keys, Devices and Organizations & Users. This documentation will help you navigate the settings interface and utilize its functionalities effectively.
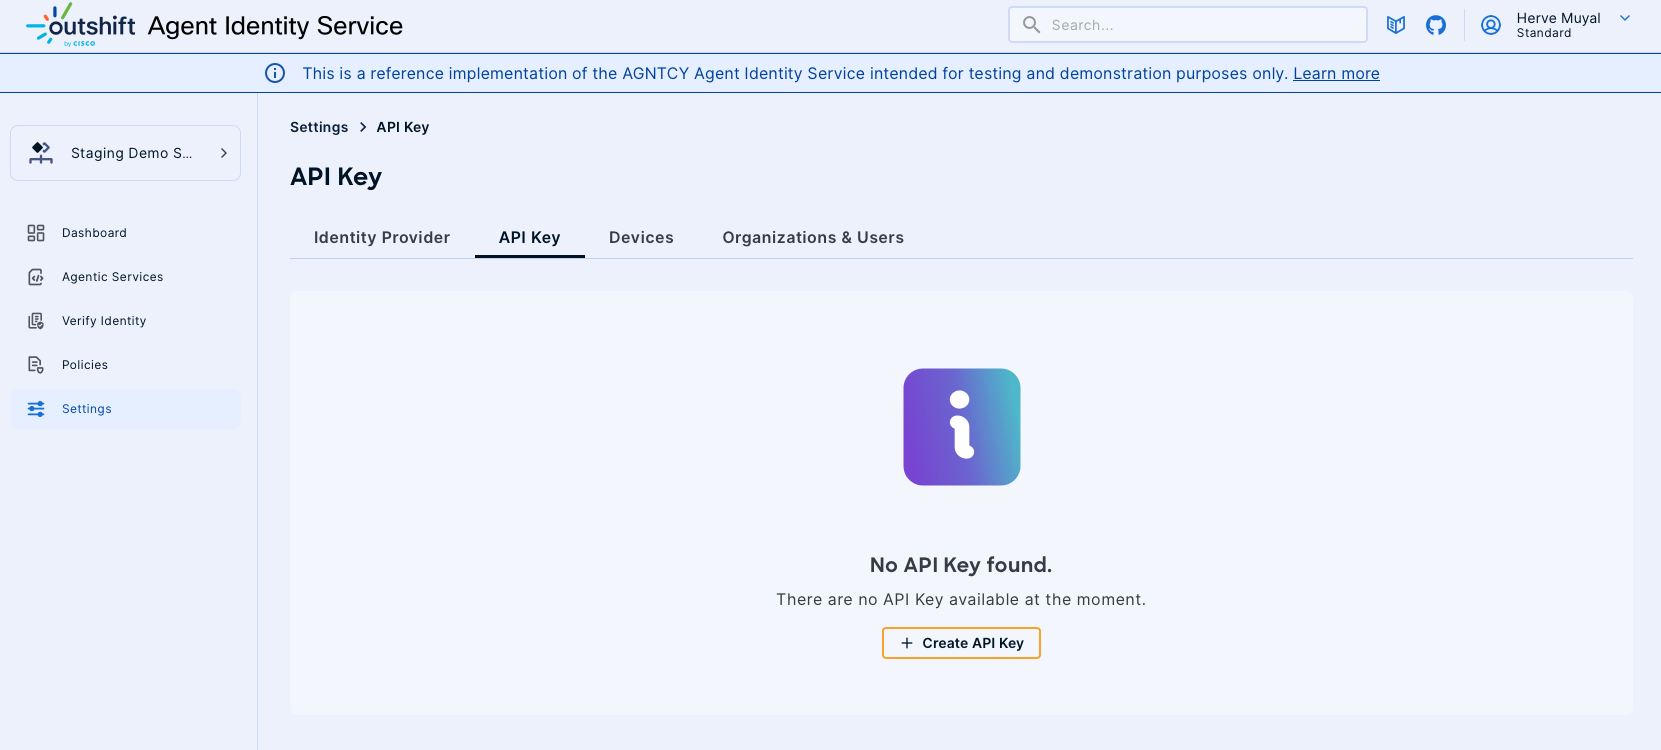
API Keys
The API Keys subsection allows administrators to create, view, and manage API Keys within the AGNTCY Identity Service. These keys are essential for authenticating and securing interactions between Agentic Services and external systems.
Accessing API Keys
- Navigate to API Keys: From the "Settings" menu on the left-hand navigation panel, select the "API Key" tab.
Creating an API Key
-
Create API Key: If no API Keys are found, click on the "+ Create API Key" button to initiate the creation process.
-
Generate API Key: Upon clicking "Create API Key," the system will generate a new API Key for use.
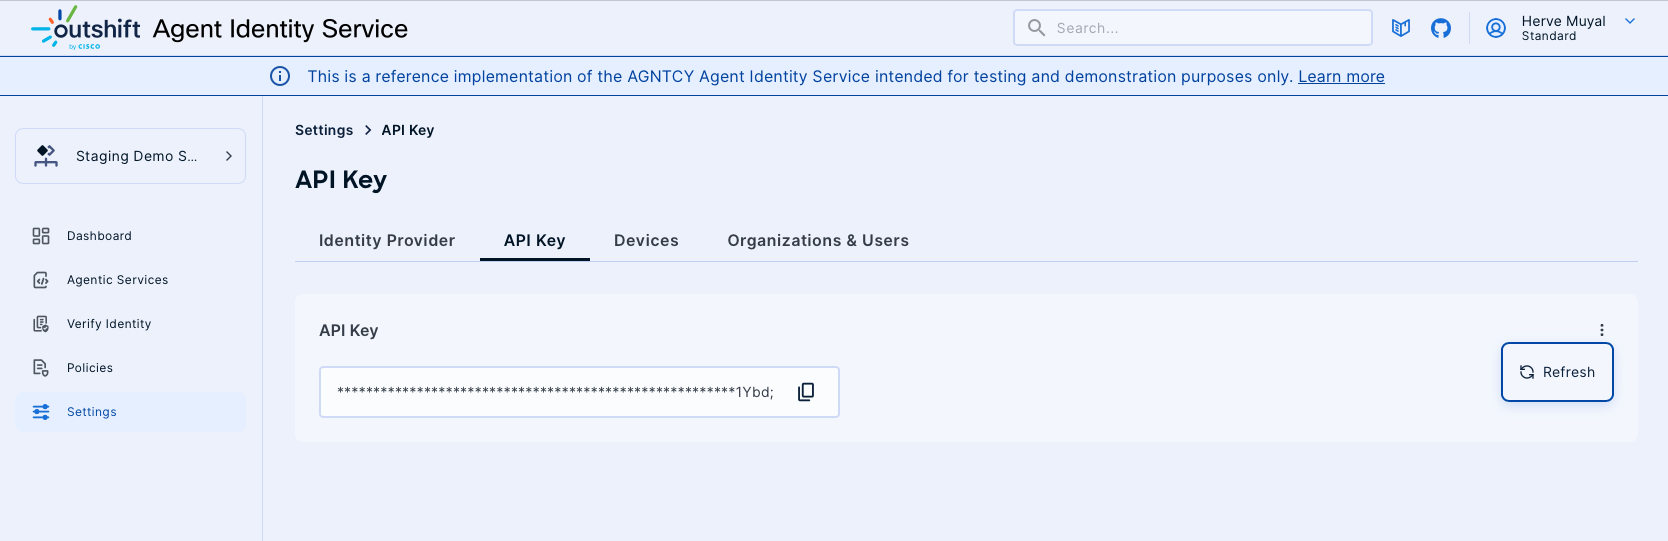
Managing API Keys
-
Viewing API Keys: The API Keys tab will display all existing keys. Each key can be copied for use by clicking the copy icon next to it.
-
Refresh API Key: To refresh an existing API Key, click the "Refresh" button. This will generate a new key and invalidate the old one.
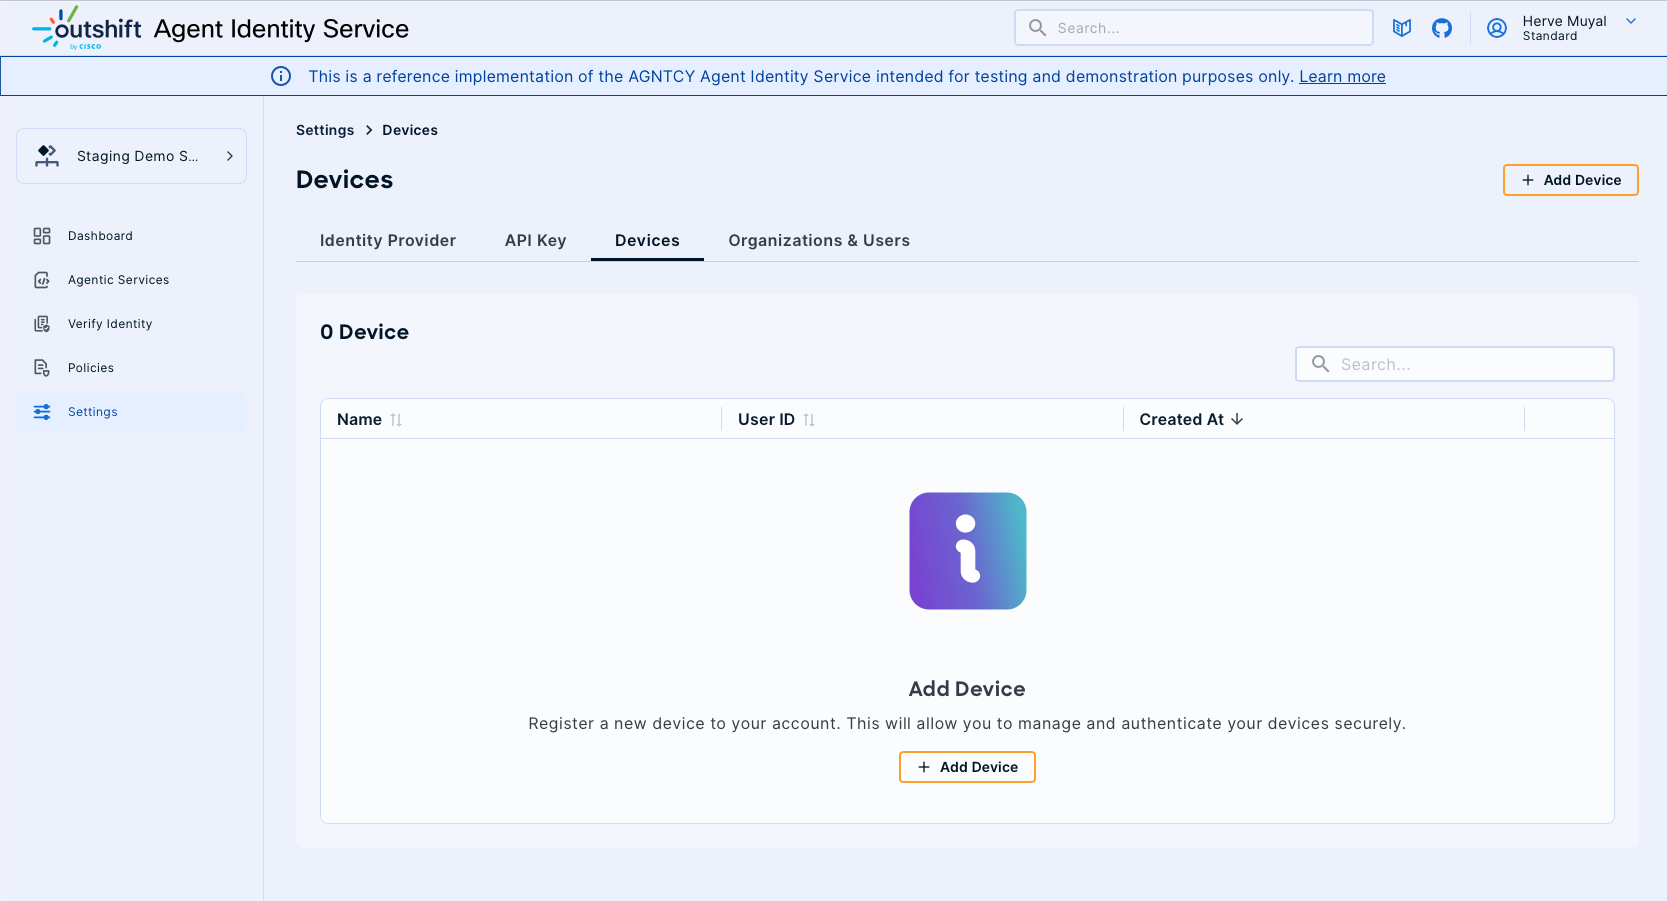
Devices
The Devices section within the AGNTCY Identity Service allows you to register and manage your personal devices for secure authentication and notification purposes. By onboarding a device, you enable it to receive push notifications for identity approvals and enhance the overall security posture of your Agent Identity environment. This guide details the process of adding a new device and managing existing ones.
Adding a New Device
Follow these steps to register and configure your device:
-
Access the Devices Section:
-
From the main dashboard, locate and click on Settings in the left-hand navigation menu.
- Within the Settings section, select Devices.
-
On the Devices management page, click the + Add Device button to initiate the connection wizard.
-
Onboard Your Device:
-
A pop-up window titled "Onboard Device" will appear, displaying a QR code. This QR code is unique to your session and is used to link your mobile device.
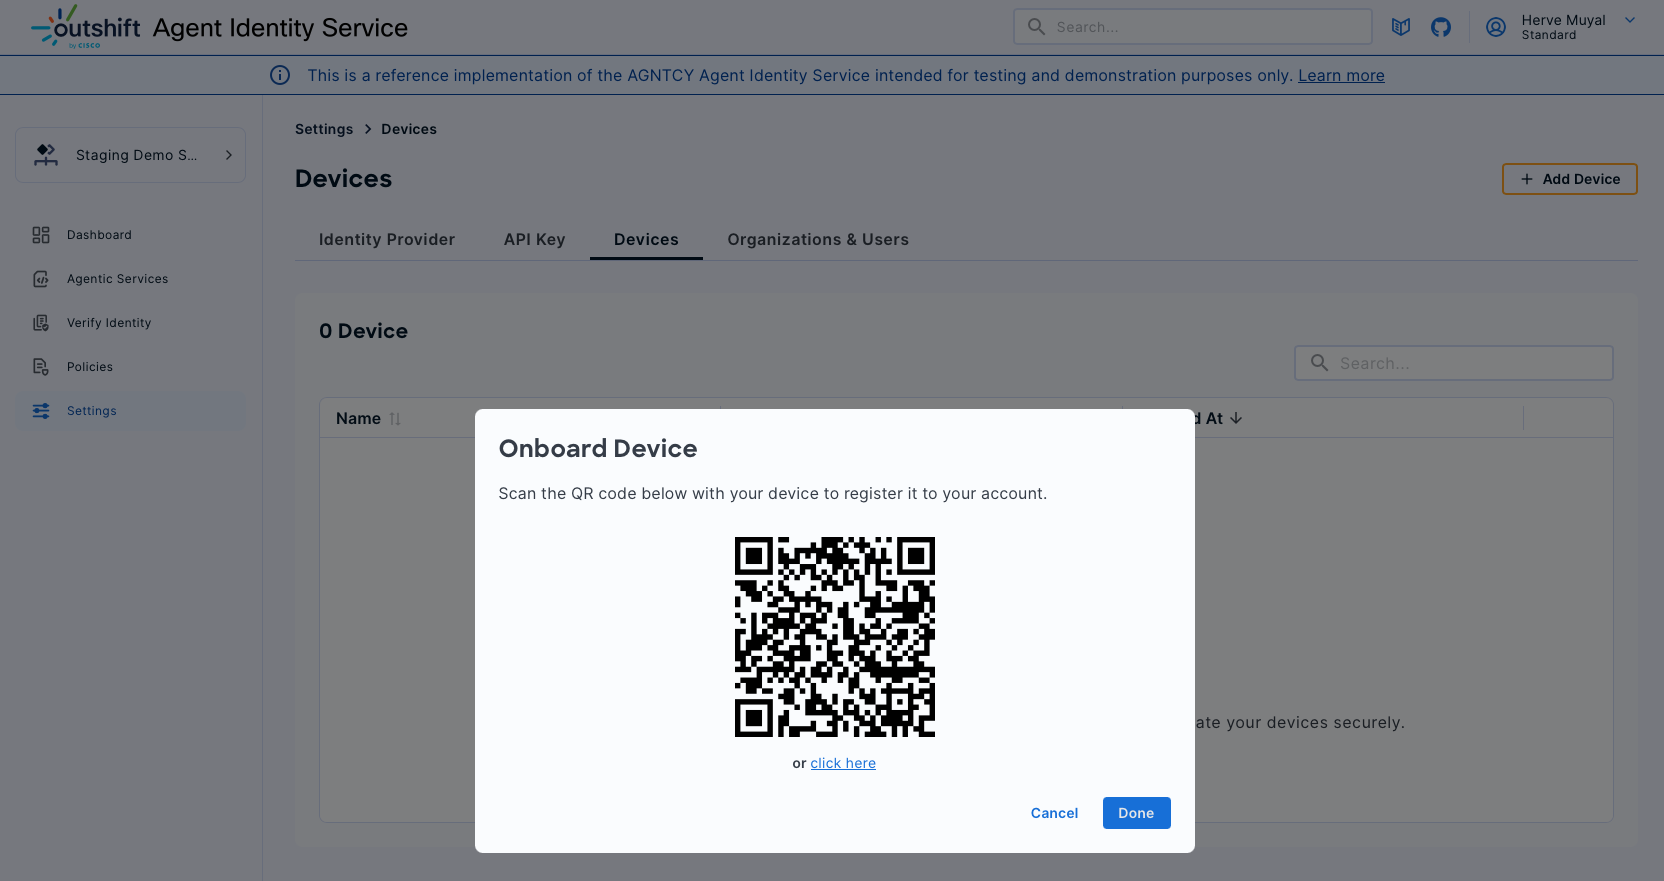
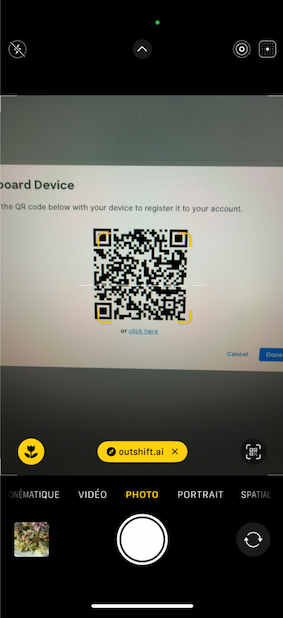
-
Using your mobile device's camera, scan the displayed QR code. Alternatively, you can click the "or click here" link if scanning is not feasible.
-
Enable Notifications on Your Mobile Device:
-
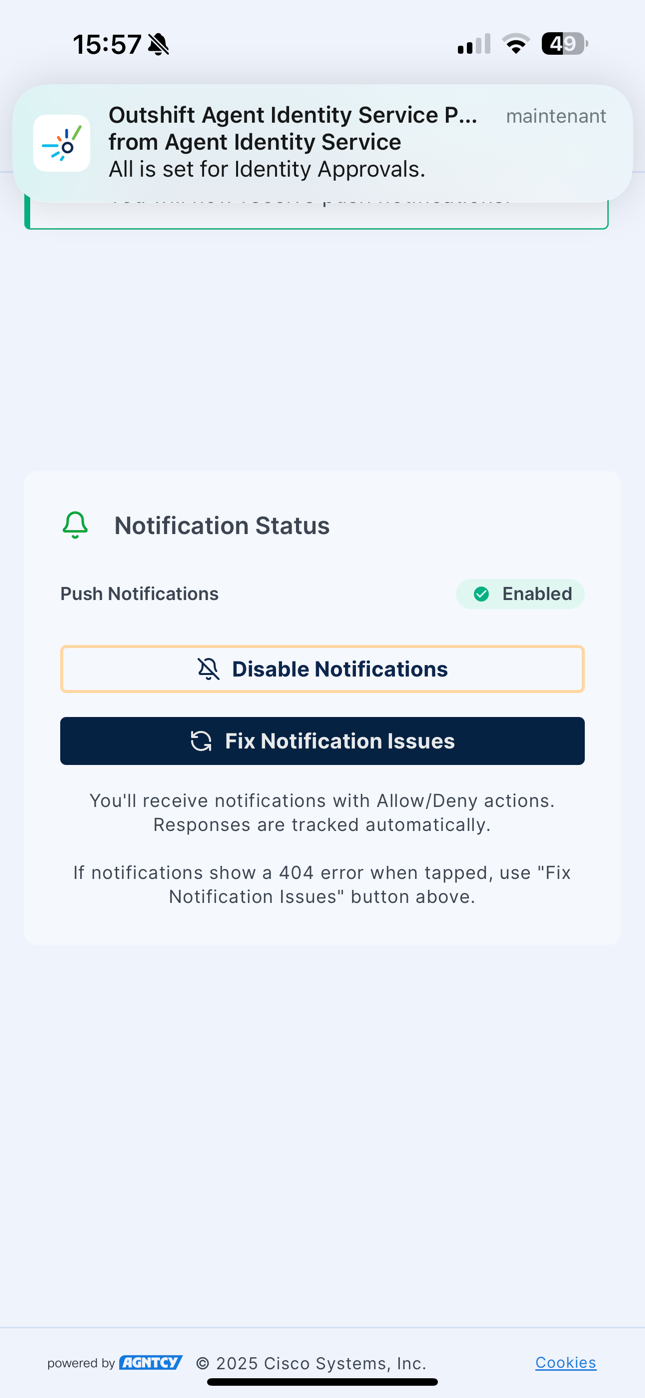
After scanning the QR code, your mobile device will open a web page. Initially, you might see a "Notification Status: Push Notifications Not Supported" message.
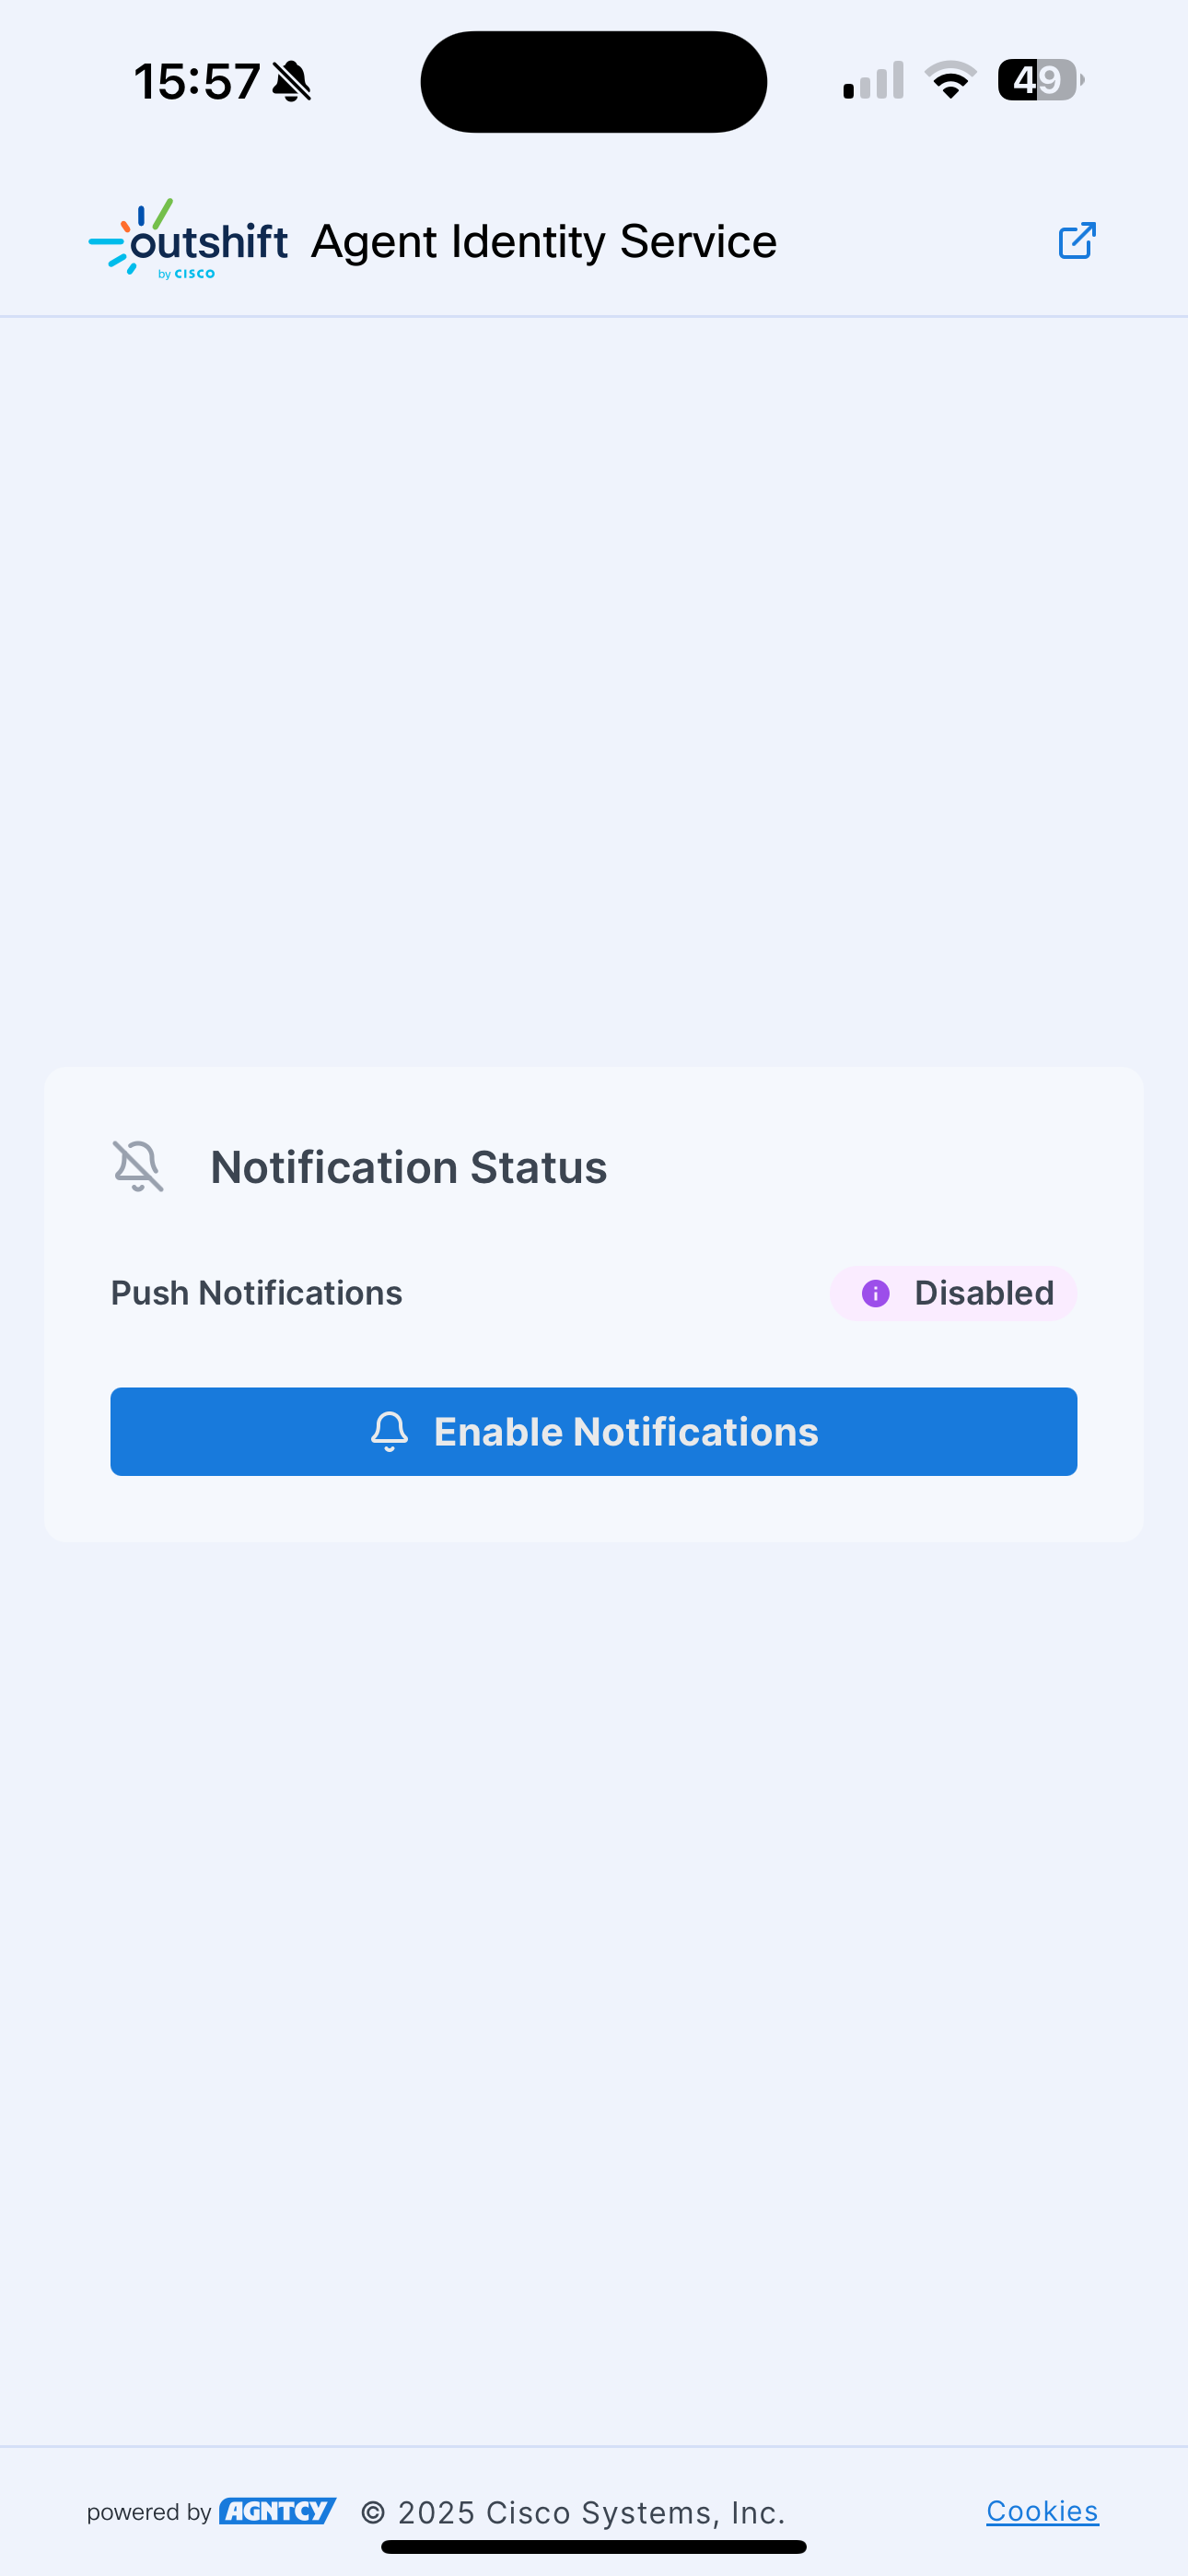
-
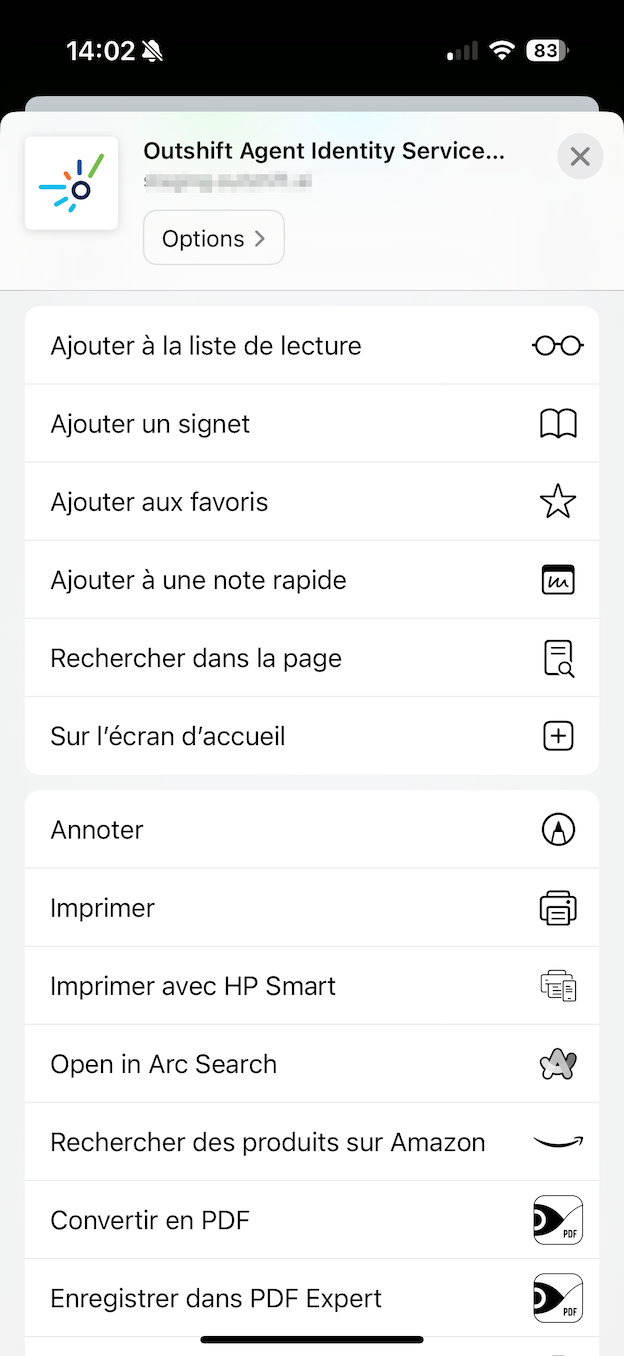
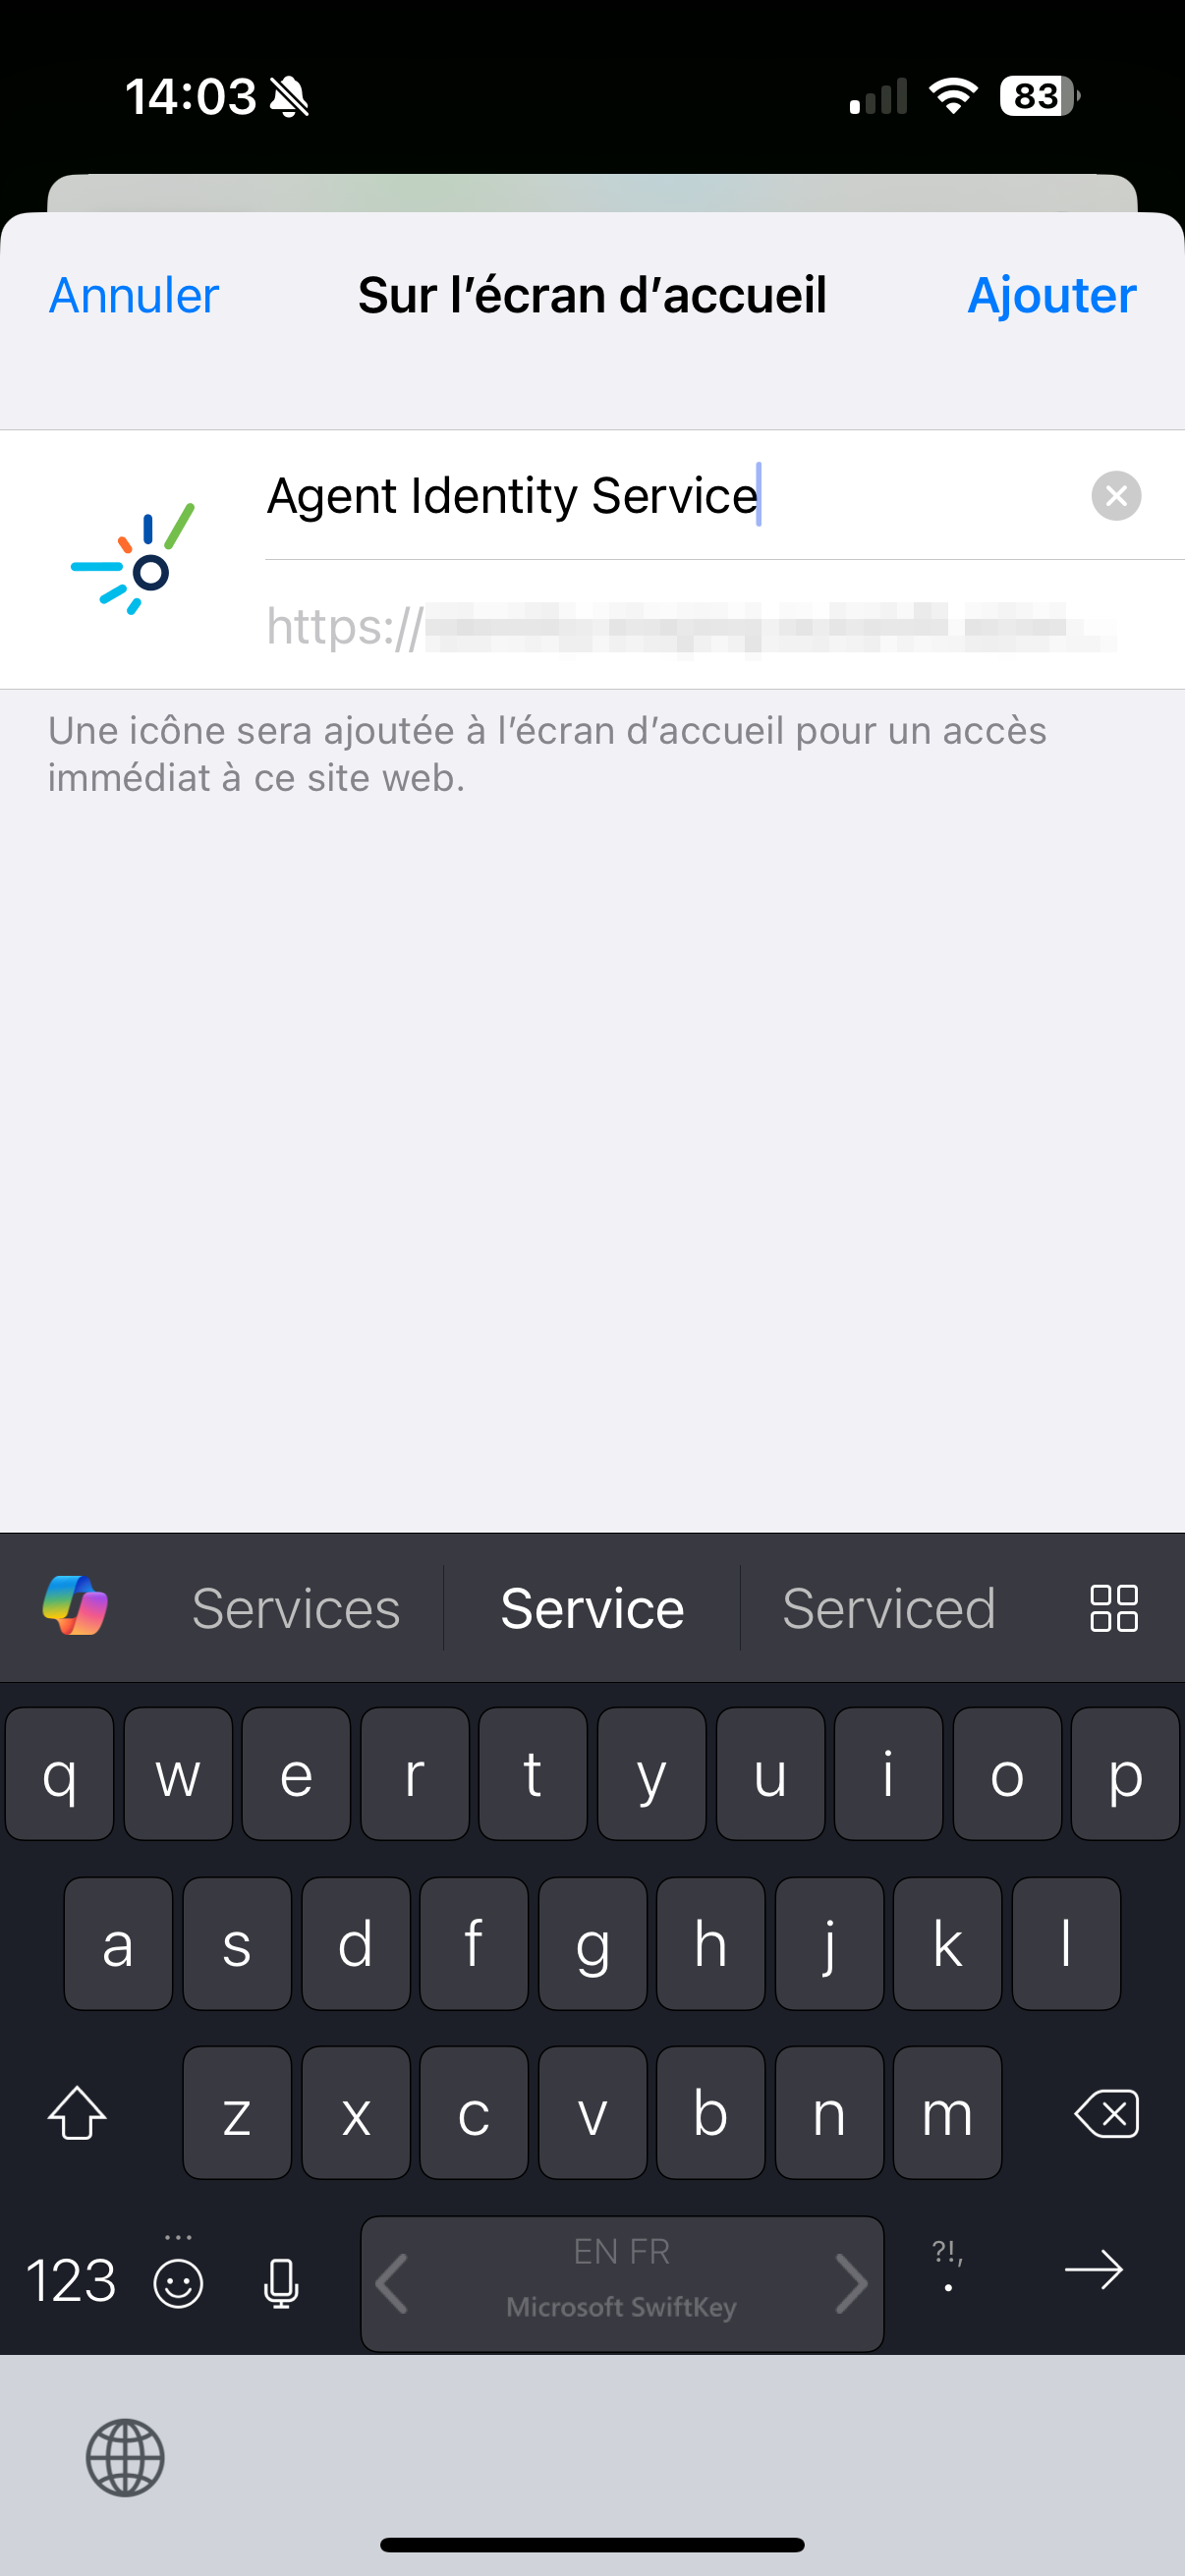
To enable notifications, you may need to add the AGNTCY Identity Service web page to your mobile device's home screen. Access your browser's options (e.g., the share icon on iOS) and select "Add to Home Screen".
-
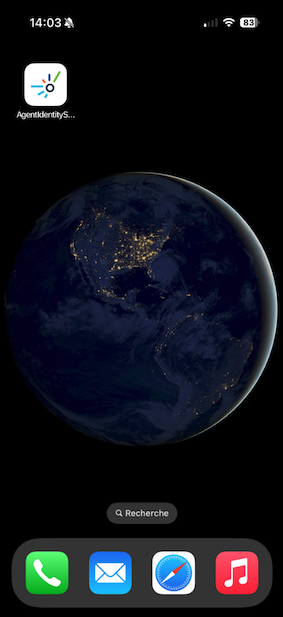
Confirm the addition. An icon for the AGNTCY Identity Service will appear on your home screen.
-
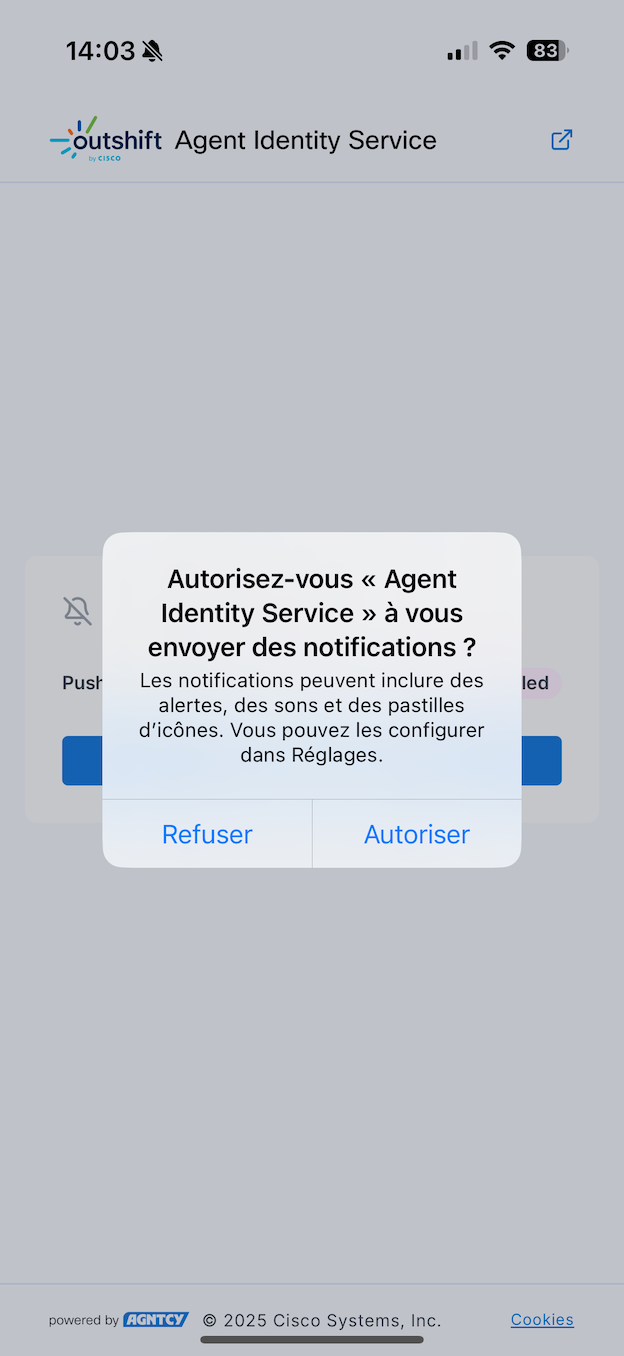
Open the newly created home screen application. You will be prompted to authorize notifications. Select Authorize.
-
Upon successful authorization, the "Notification Status" on the web page should update to "Push Notifications Enabled".
Managing Registered Devices
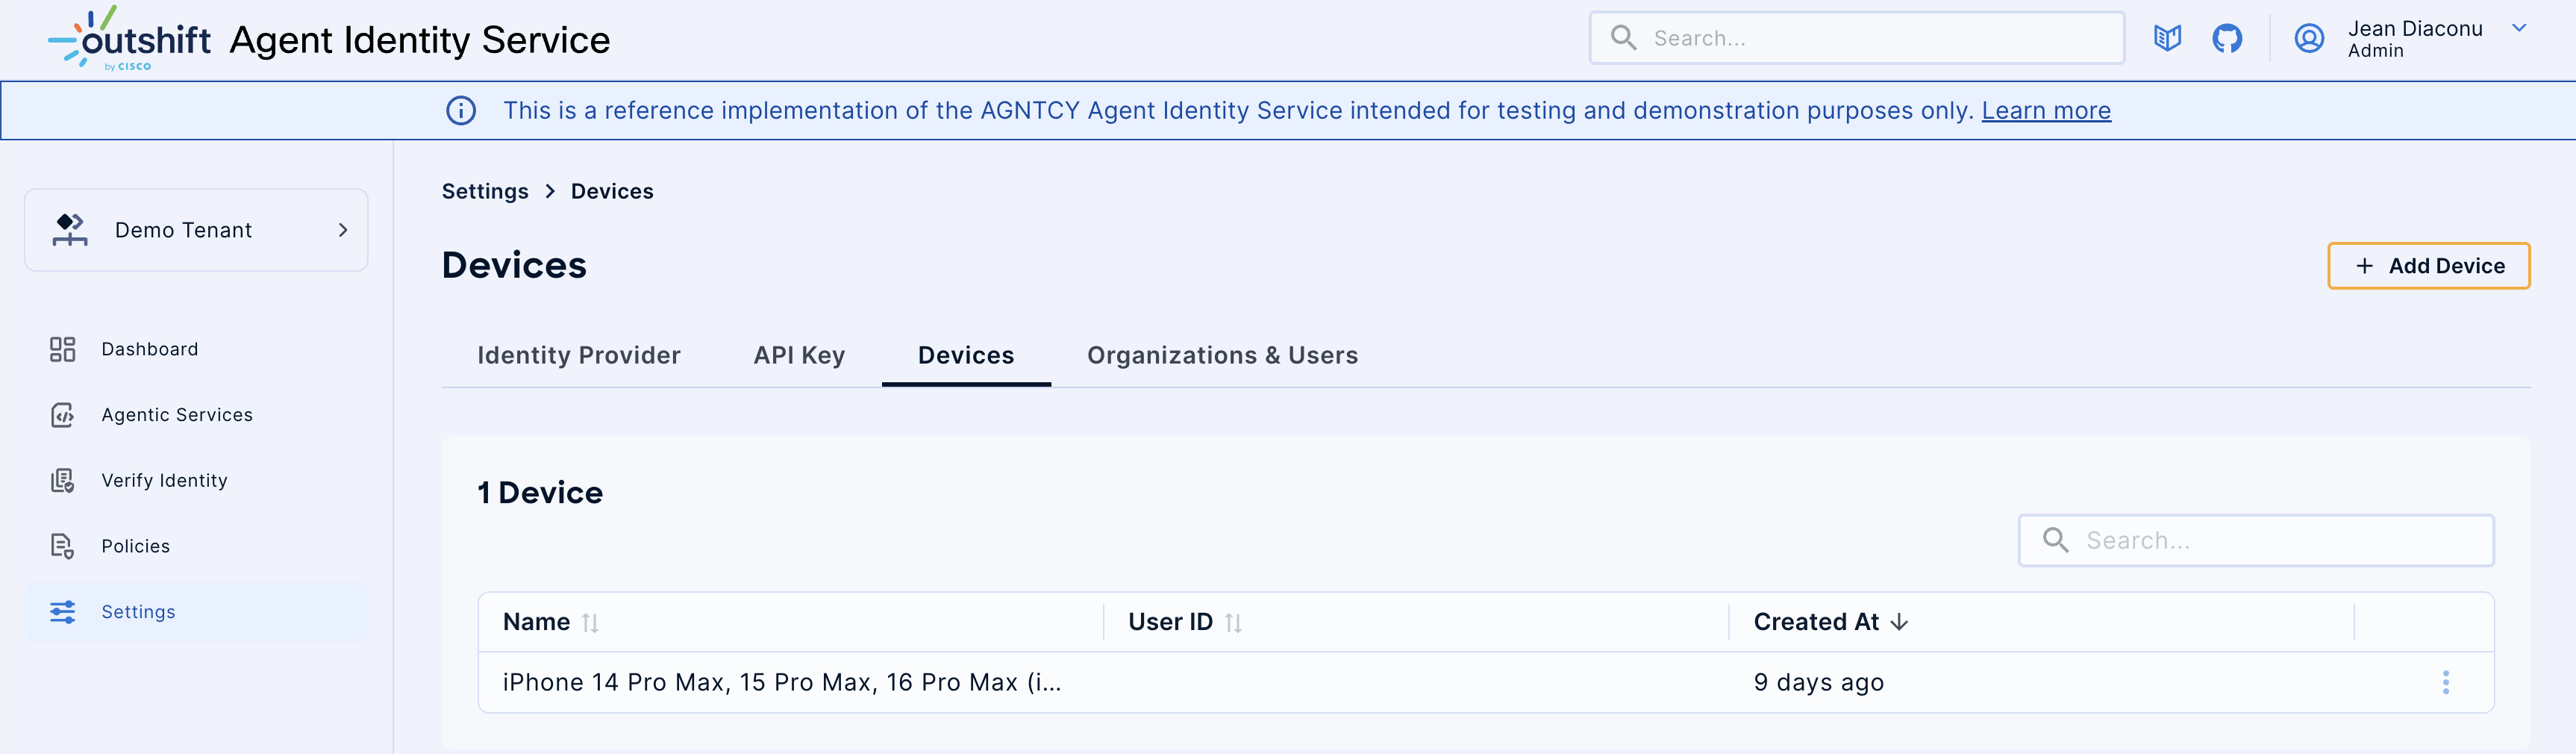
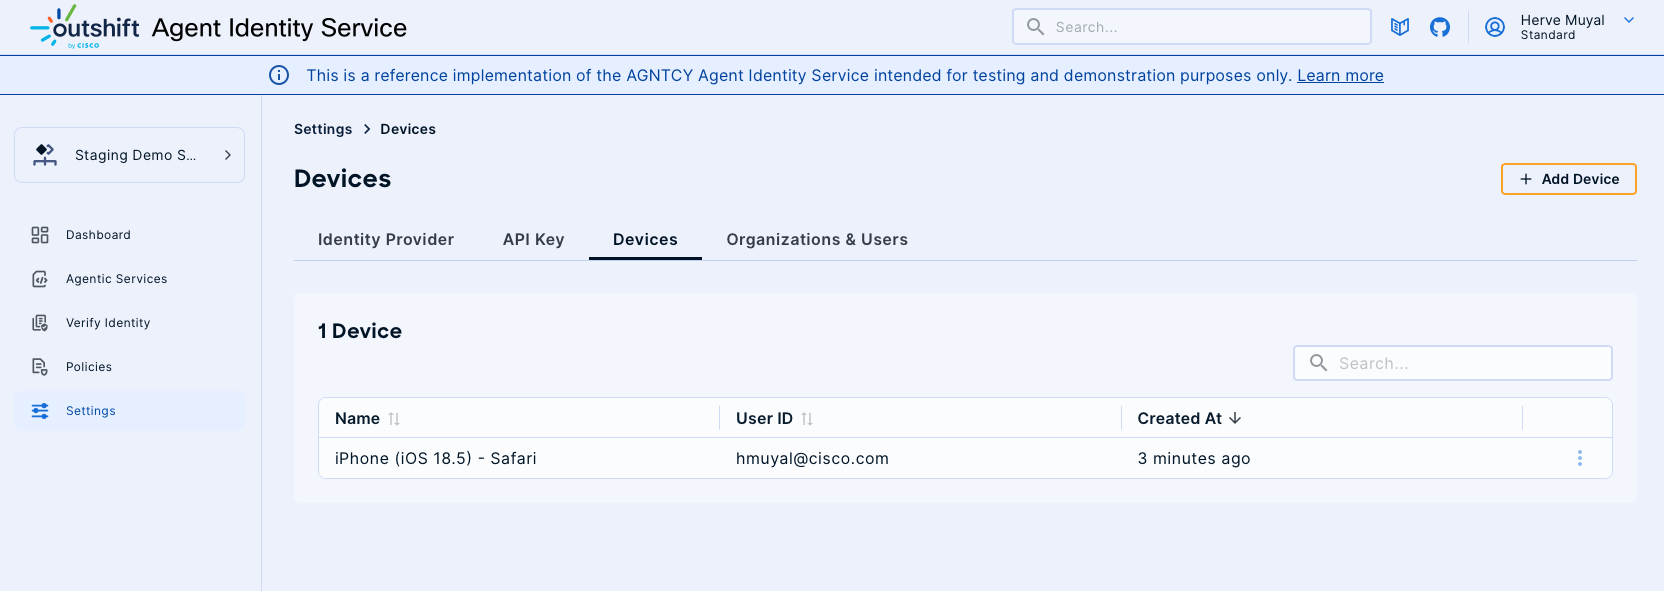
Once a device is successfully added, you can view and manage it from the Devices section in the AGNTCY Identity Service portal.
-
Viewing Registered Devices:
-
The Devices dashboard will now display a list of your registered devices, including details such as the device name (e.g., "iPhone (iOS 18.5) - Safari"), User ID, and the "Created At" timestamp.
-
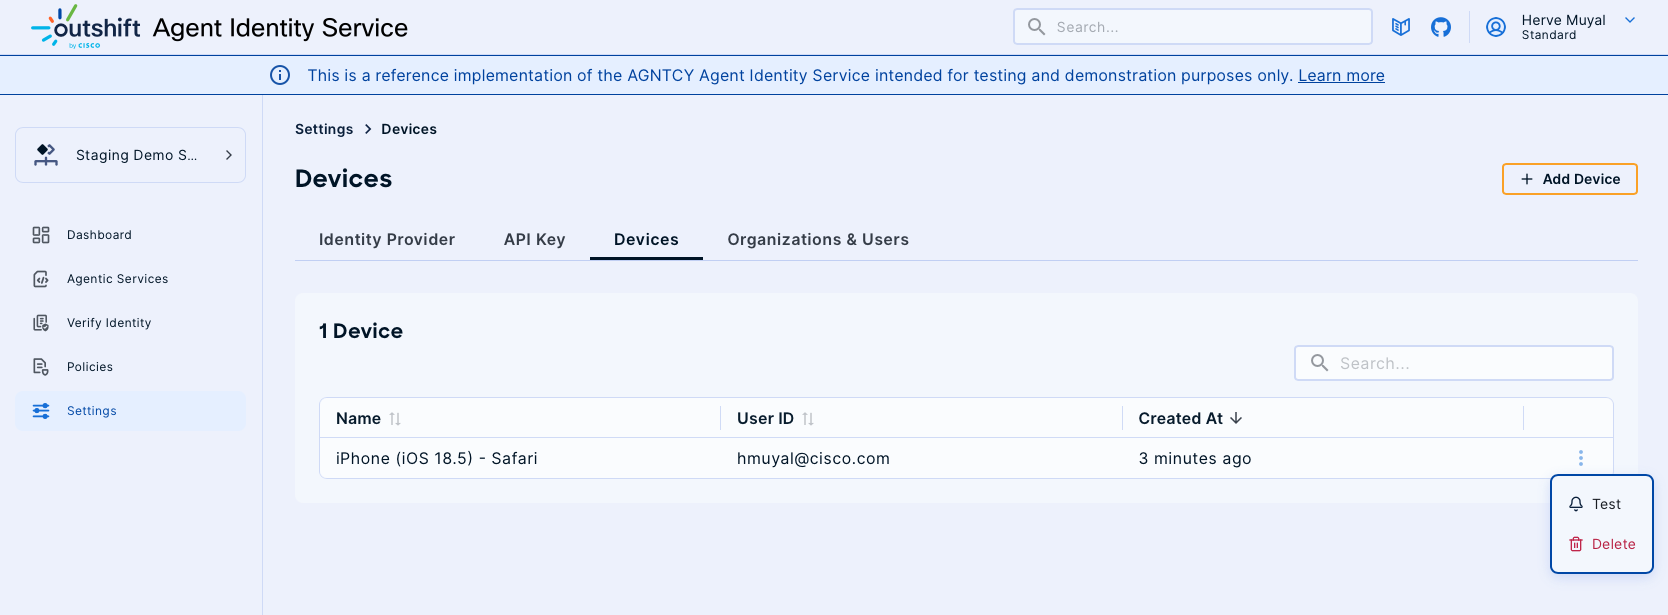
Testing Device Notifications:
-
To ensure your device is receiving notifications correctly, you can send a test notification.
-
Locate the desired device in the list and click the options menu next to its entry.
-
From the dropdown menu, select Test.
- A test notification will be sent to your registered device, appearing as a push notification on your mobile screen.
-
Deleting a Device:
-
If a device is no longer needed or you wish to remove it from your account, you can delete it.
-
From the options menu next to the device entry, select Delete.

-
Confirm the deletion when prompted.
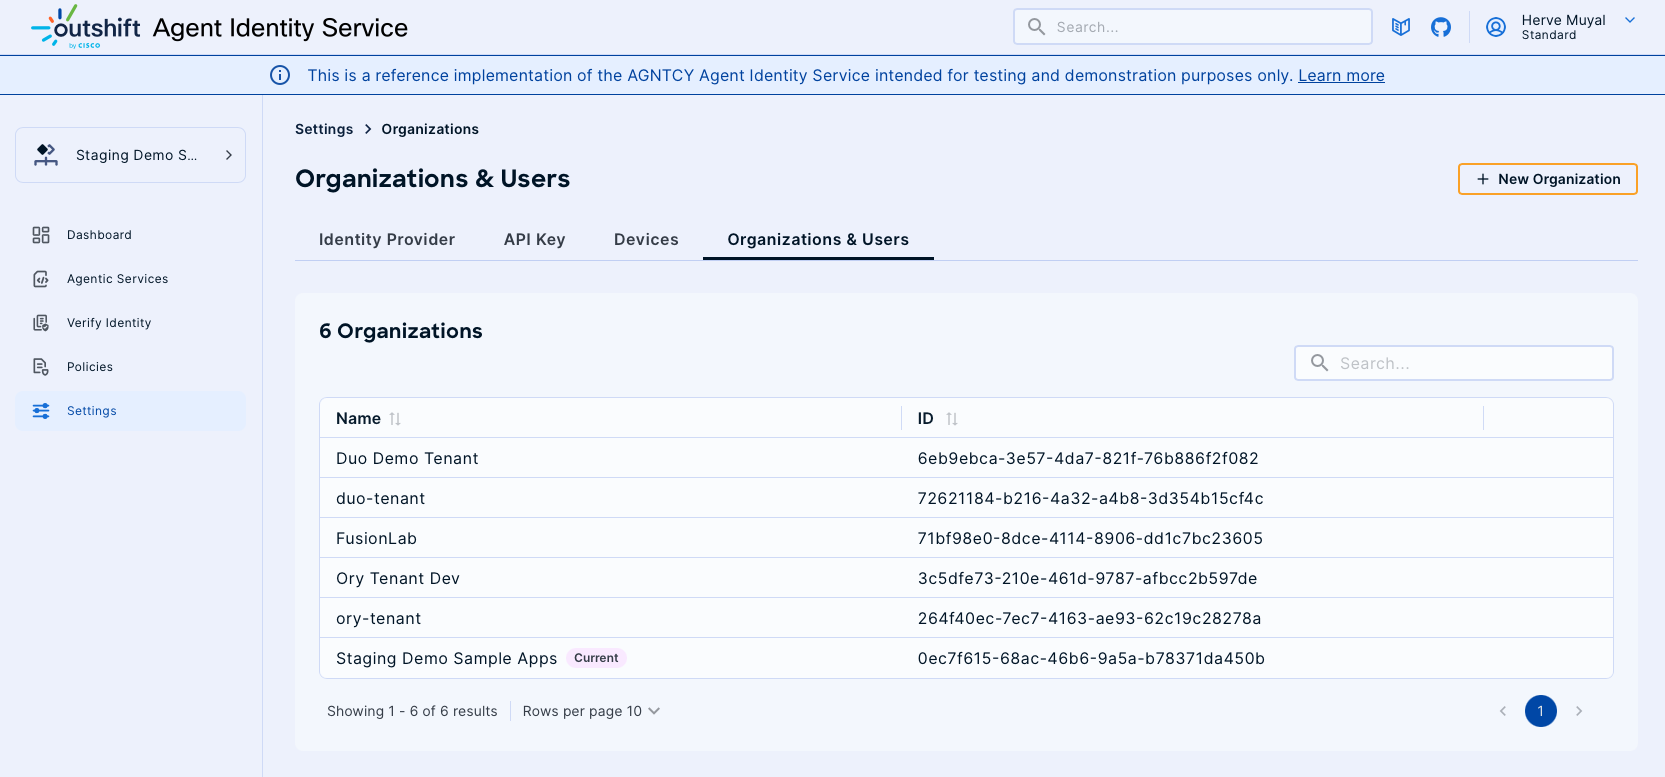
Organizations & Users
The Organizations & Users subsection provides tools for managing organizational structures and user roles within the AGNTCY Identity Service. This section is crucial for defining user access and maintaining organizational oversight.
Accessing Organizations & Users
- Navigate to Organizations & Users: From the "Settings" menu, select the "Organizations & Users" tab to view existing organizations.
Creating and Managing Organizations
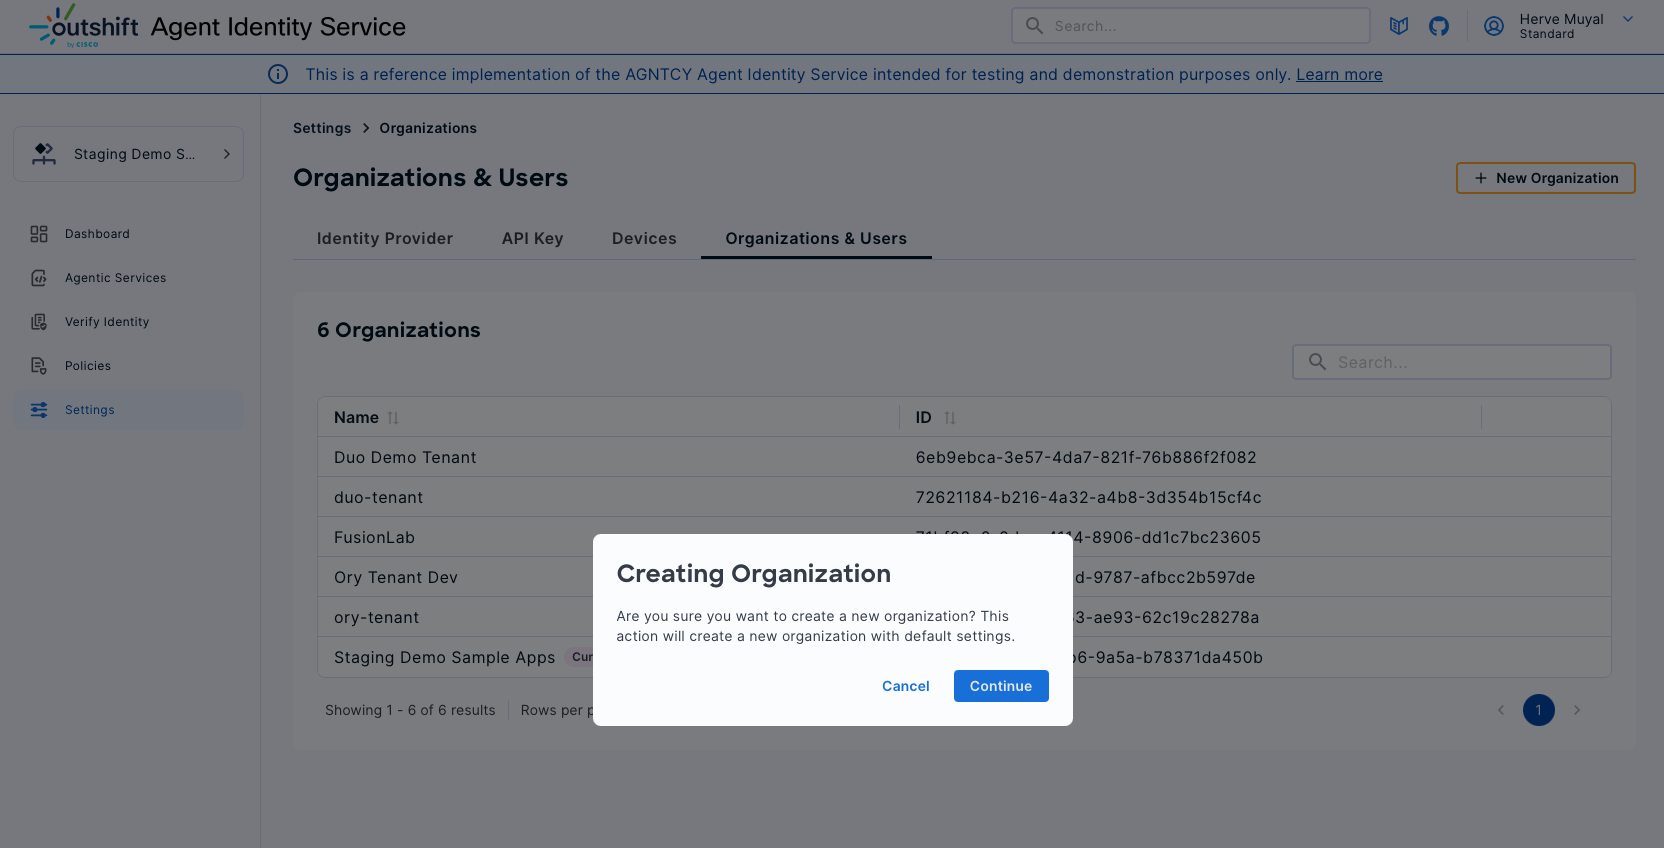
- Create New Organization: Click on the "+ New Organization" button to start the organization creation wizard.
- Confirmation and Creation: A dialog box will appear asking for confirmation to create a new organization. Click "Continue" to proceed.
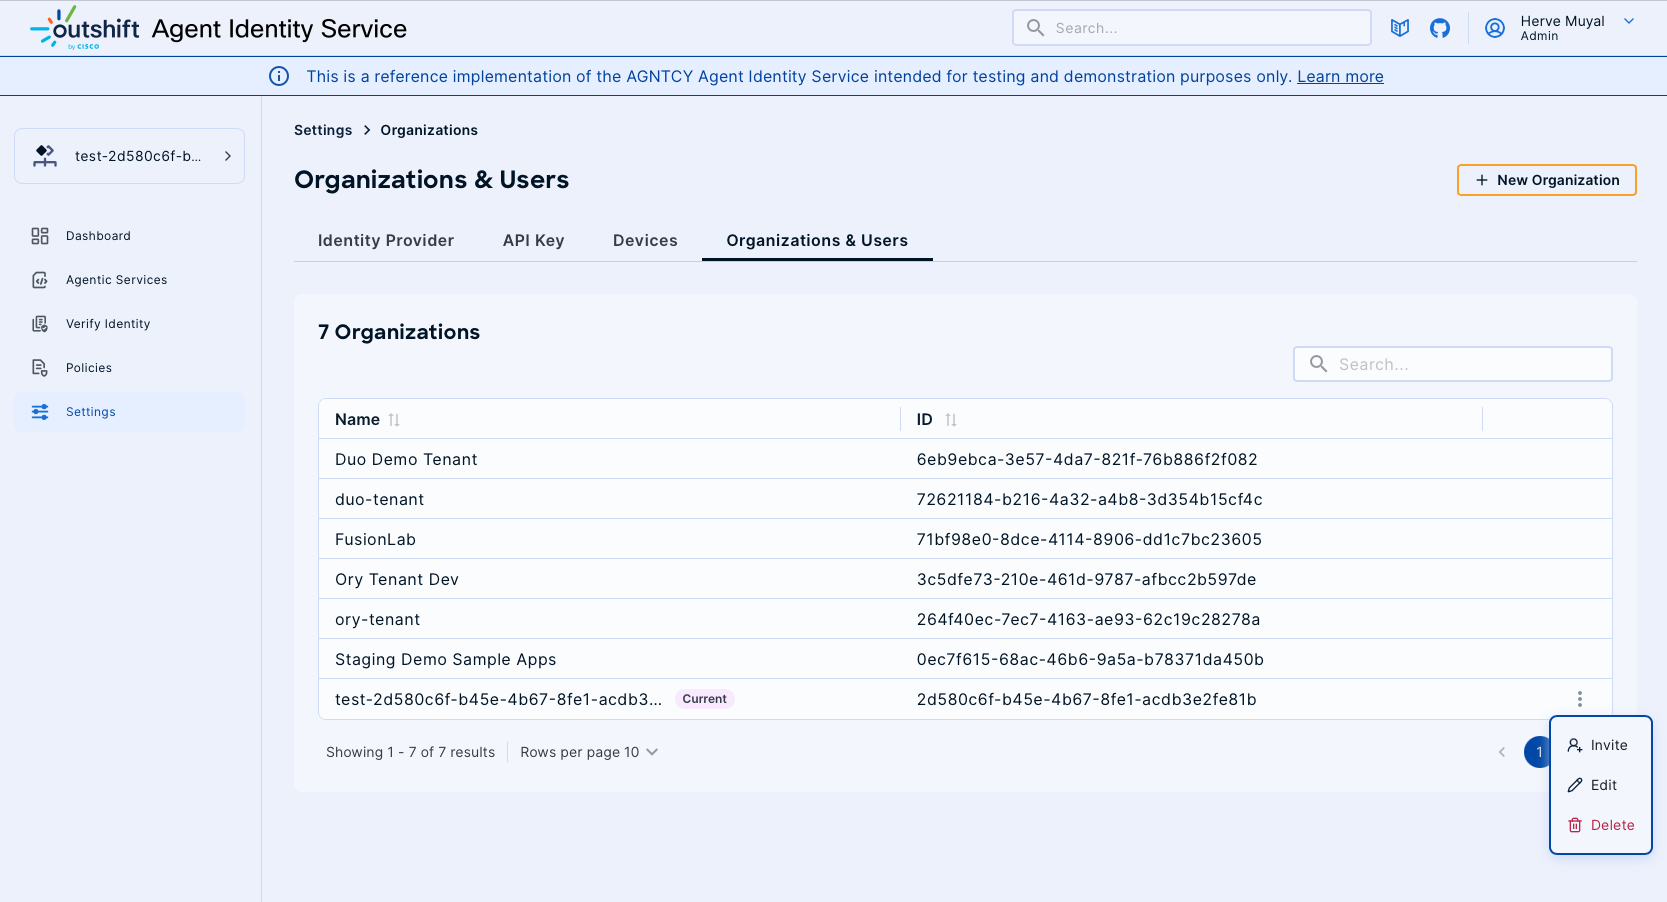
- Organization Listing: Once created, the organization will appear in the list. You can manage existing organizations by selecting options such as "Invite," "Edit," or "Delete."
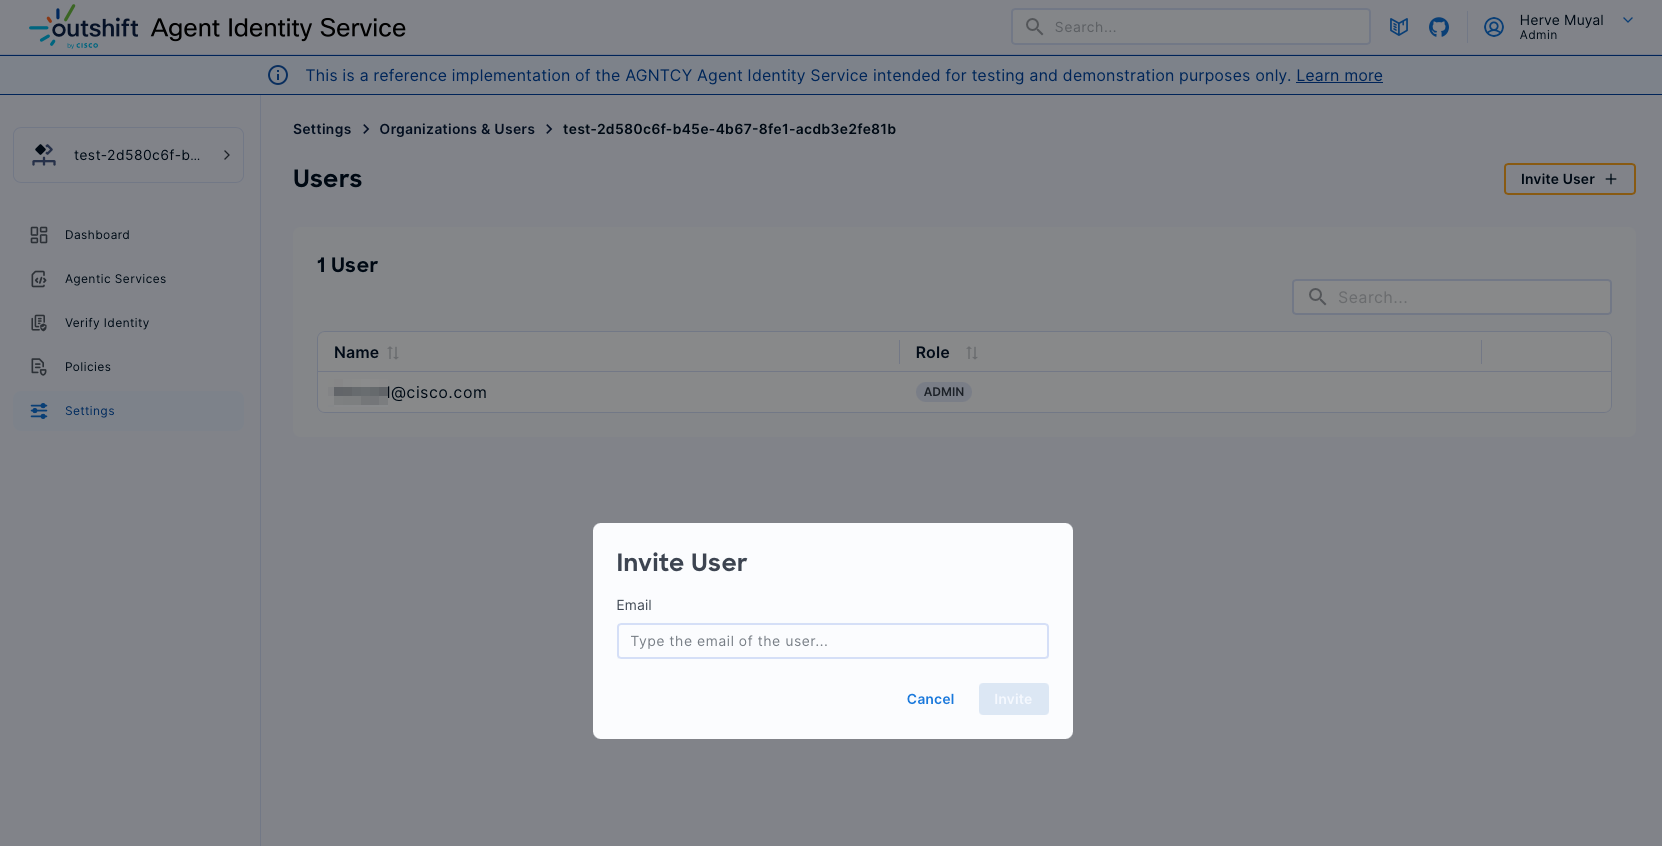
Inviting Users
- Invite User: Click on "Invite User" to open the user invitation interface.
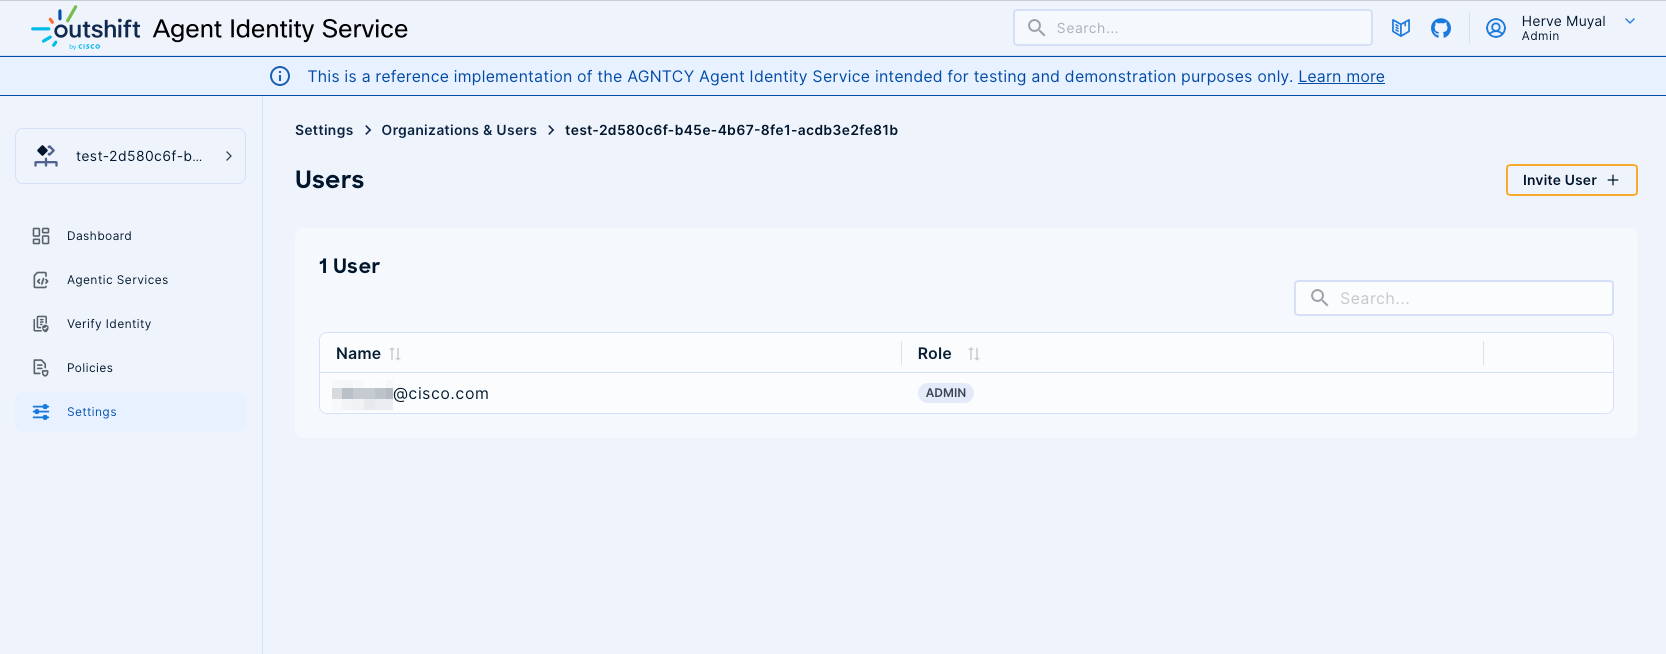
- Enter User Details: Provide the email of the user you wish to invite and click "Invite" to send an invitation.