Creating Policies for Agentic Services
The Policies section in the AGNTCY Identity Service allows administrators to define rules and permissions for Agentic Services. This guide will walk you through the process of creating, editing, and managing policies, ensuring your Agentic Services operate within the desired constraints and capabilities.
Introducing Task-Based Access Control
The AGNTCY Identity Service leverages Task-Based Access Control (TBAC) to enhance the management and security of Agentic Services. TBAC allows administrators to define specific tasks that can be performed by each service and the permissions required to execute these tasks. By integrating TBAC into your policies, you can ensure that each Agentic Service adheres to organizational security standards and operational requirements.
Benefits of TBAC
- Enhanced Security: TBAC provides a granular level of security by defining task-specific permissions, reducing the risk of unauthorized access.
- Flexibility: Easily adjust permissions as organizational needs change, ensuring your Agentic Services remain adaptable to evolving requirements.
- Centralized Management: Administer all task permissions from a single interface within the Policies section, simplifying oversight and updates.
1. Accessing the Policies Section
-
Navigate to Policies:
-
From the main dashboard, click on the "Policies" section in the left-hand navigation menu to view existing policies or create new ones.

2. Creating a New Policy
-
Add Policy:
-
Click on the "Add Policy" button to initiate the creation process. This will open the policy creation wizard.
-
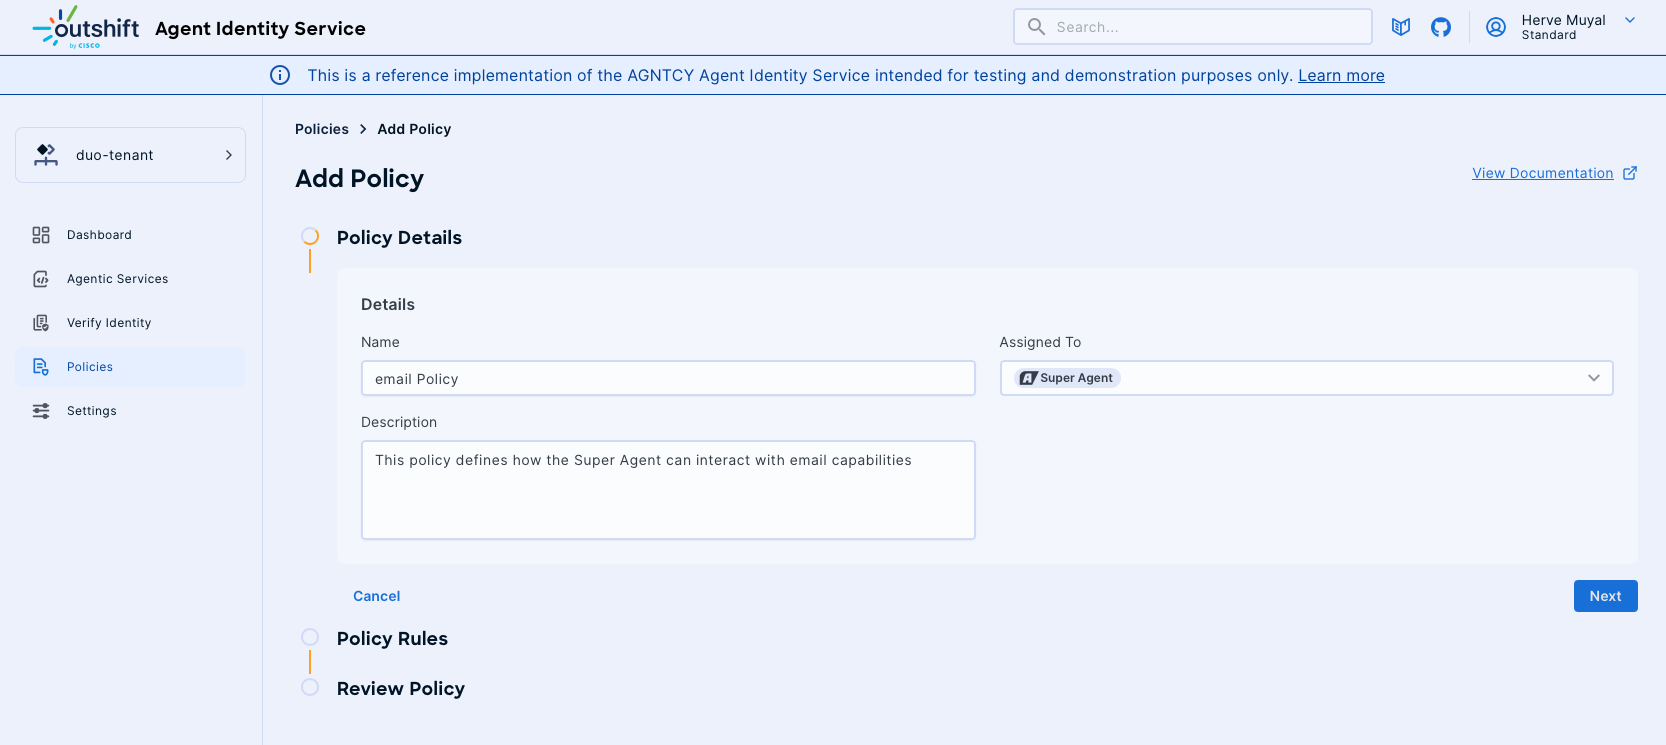
Policy Details:
-
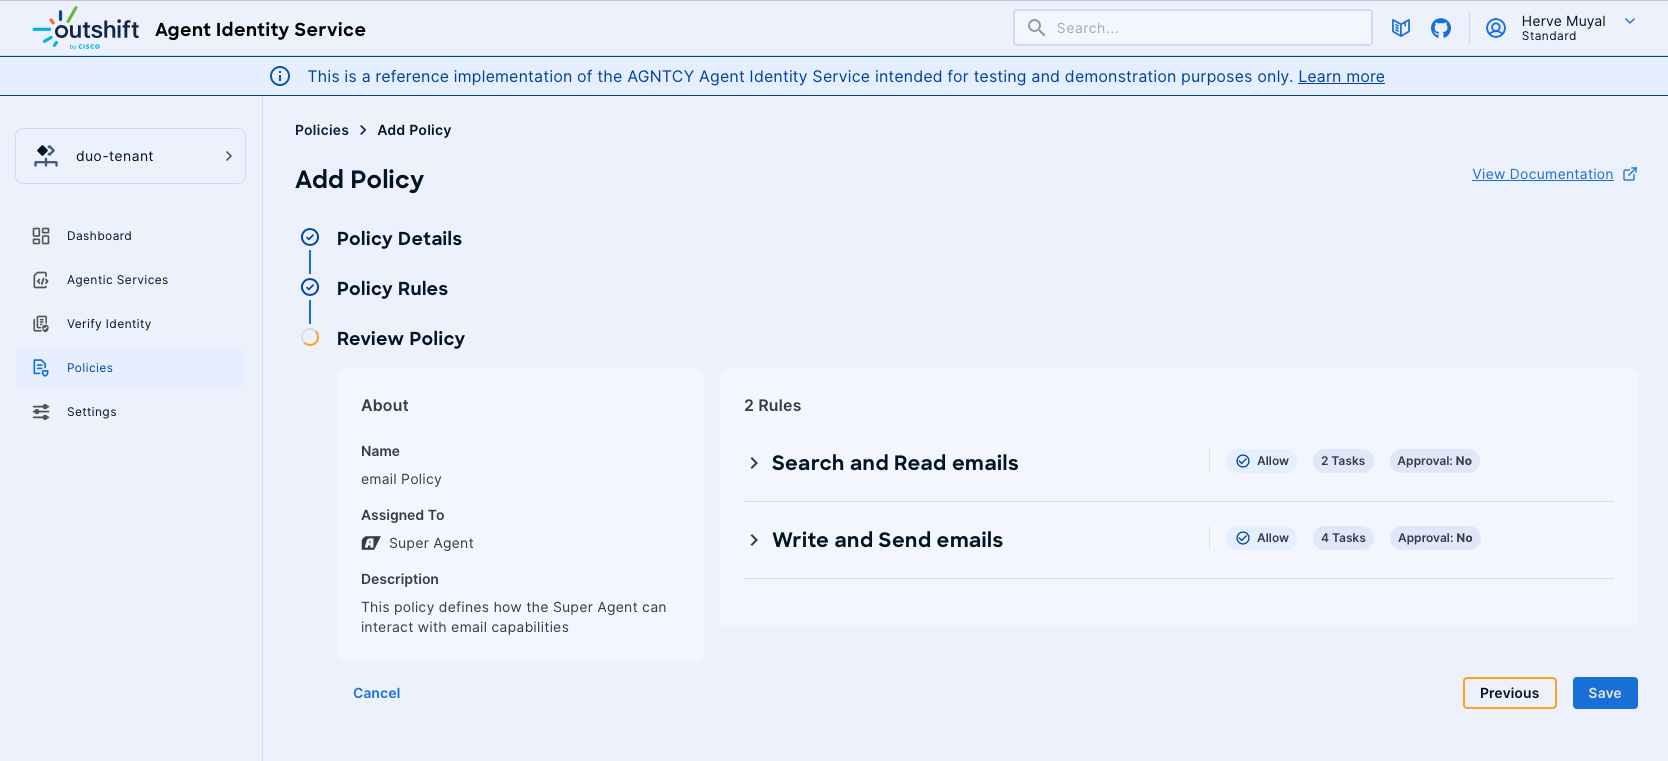
Name: Enter a descriptive name for your policy (e.g., "Email Policy").
- Assigned To: Select the Agentic Service the policy will apply to (e.g., "SuperAgent").
- Description: Provide a brief description of the policy's purpose and scope.
-
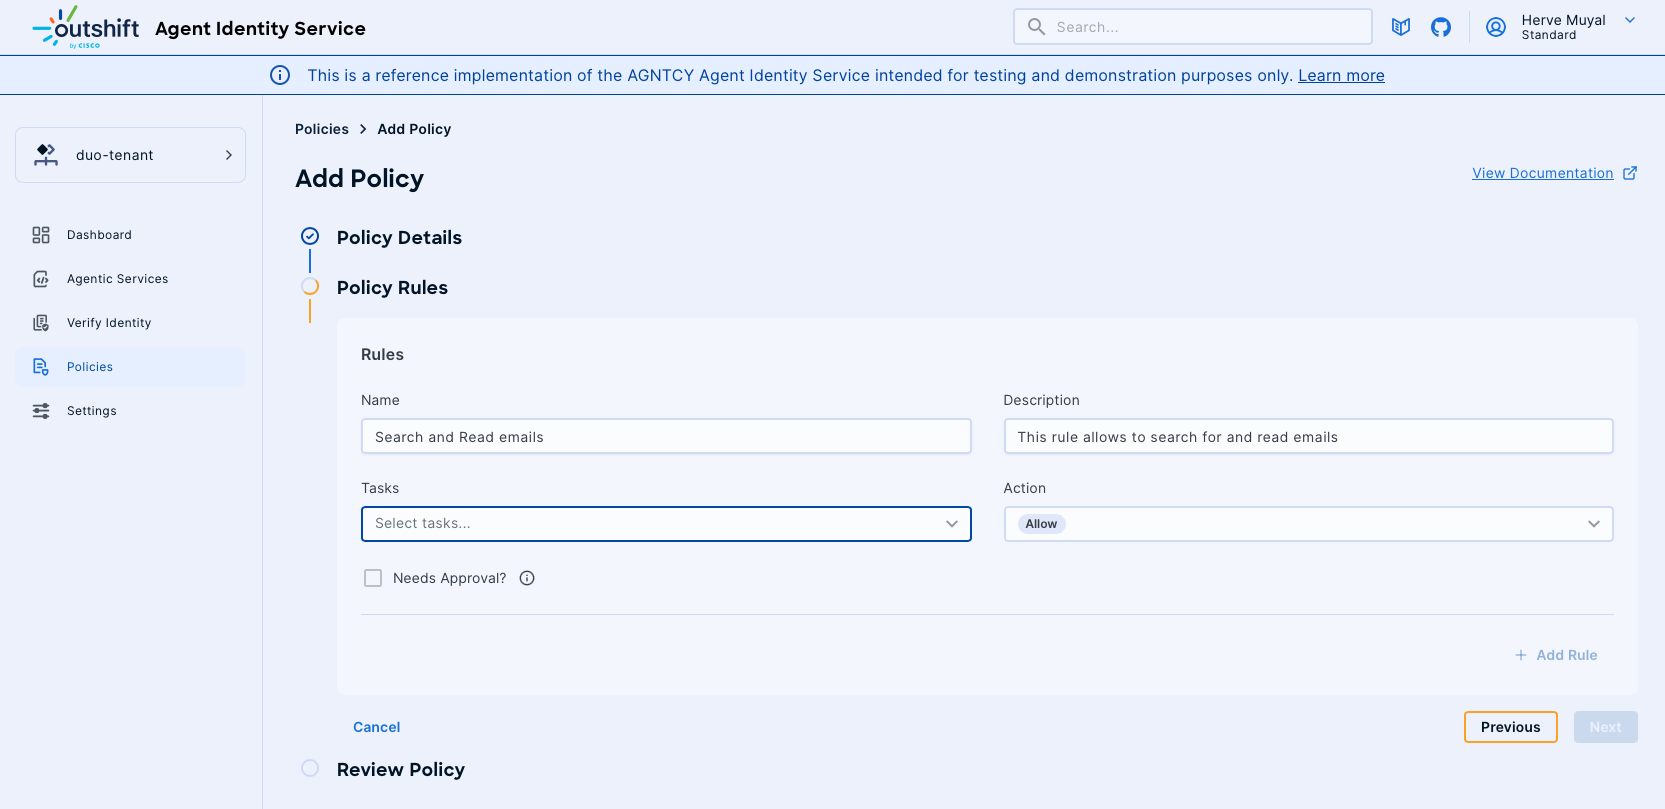
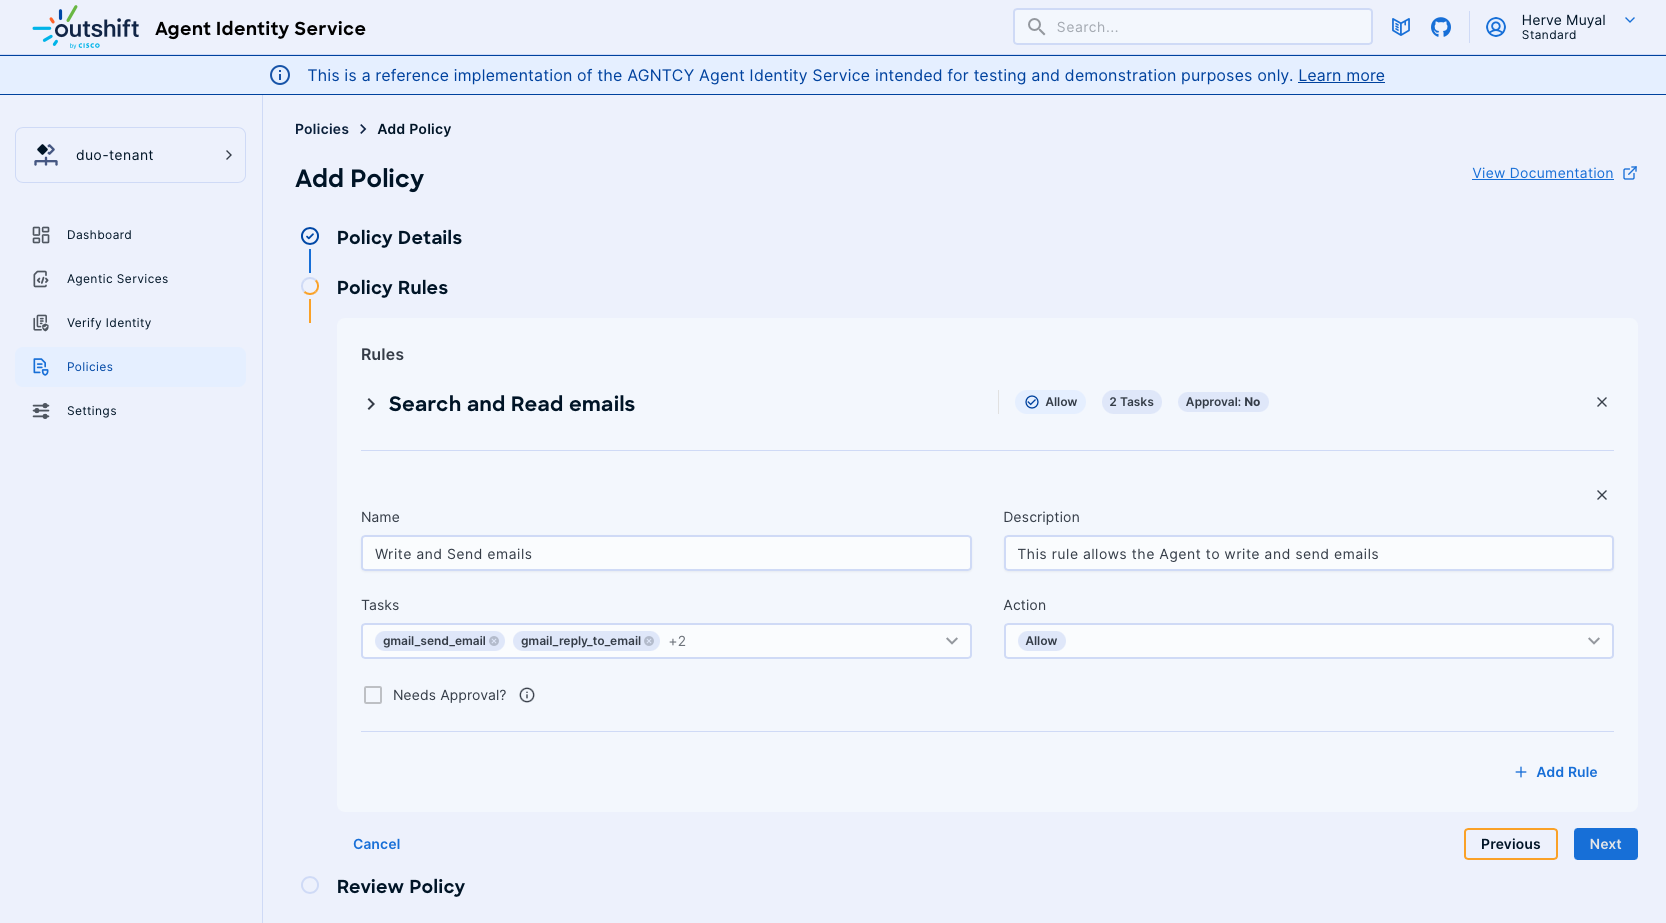
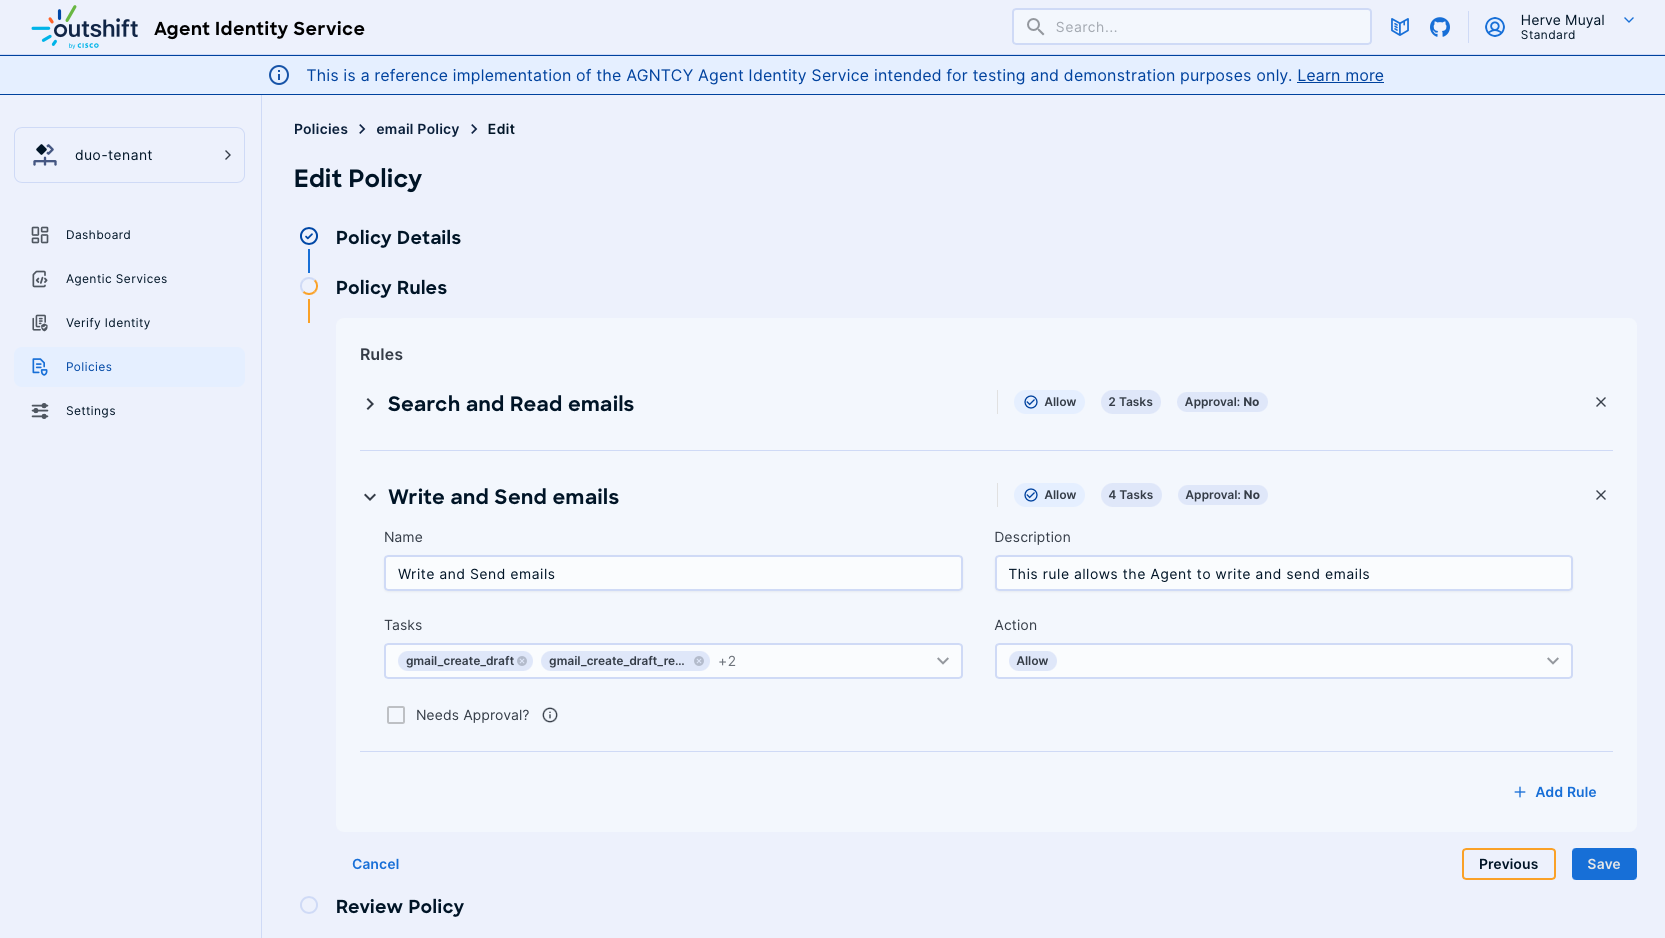
Policy Rules:
-
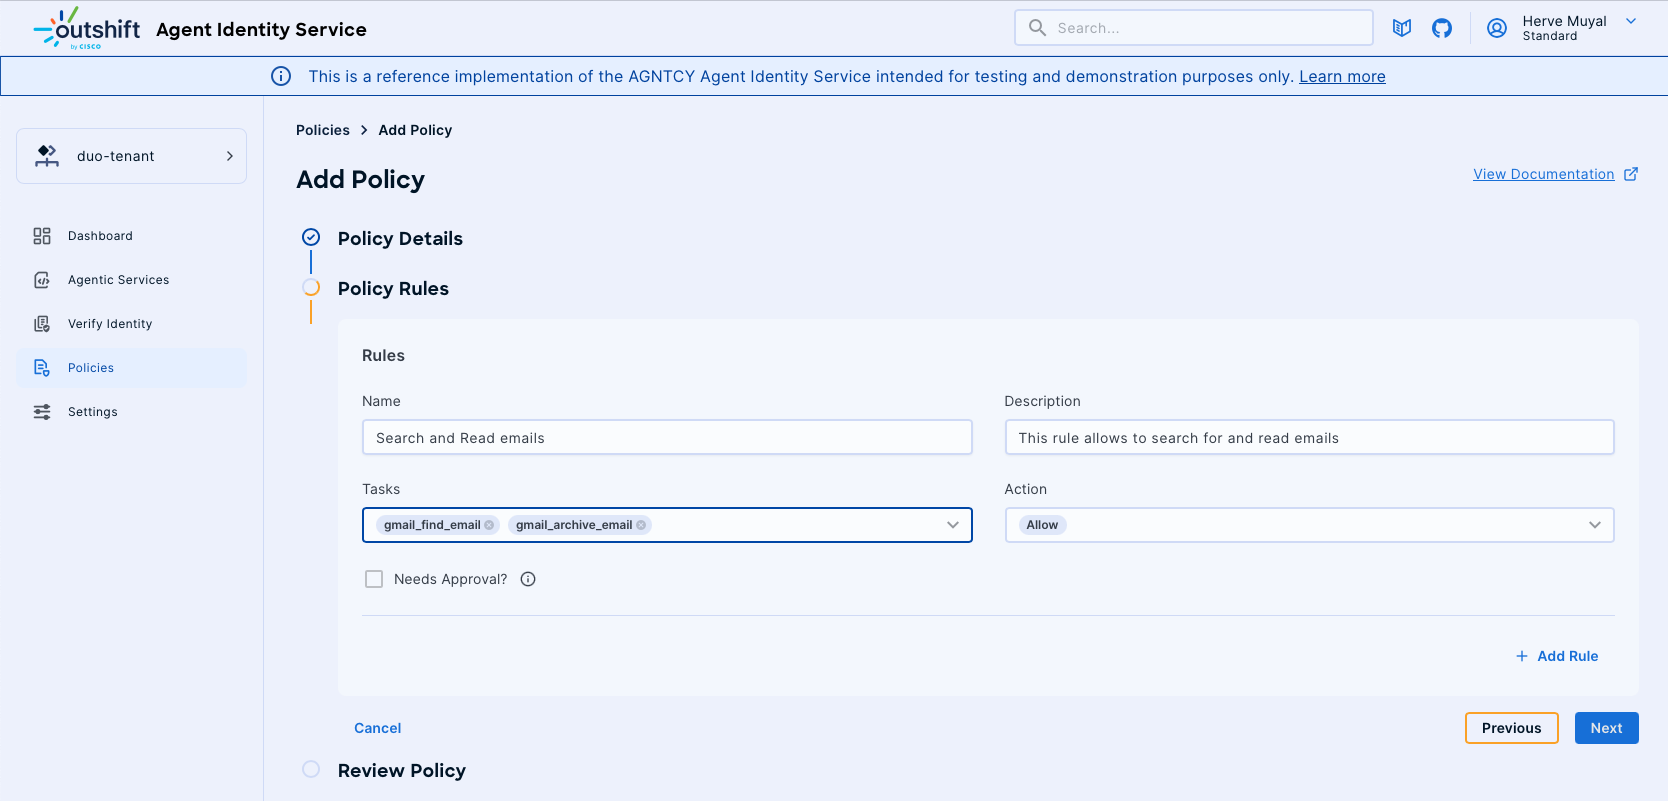
Add Rule: Define the specific actions and permissions associated with the policy.
- Name: Specify the rule name (e.g., "Search & Read Emails").
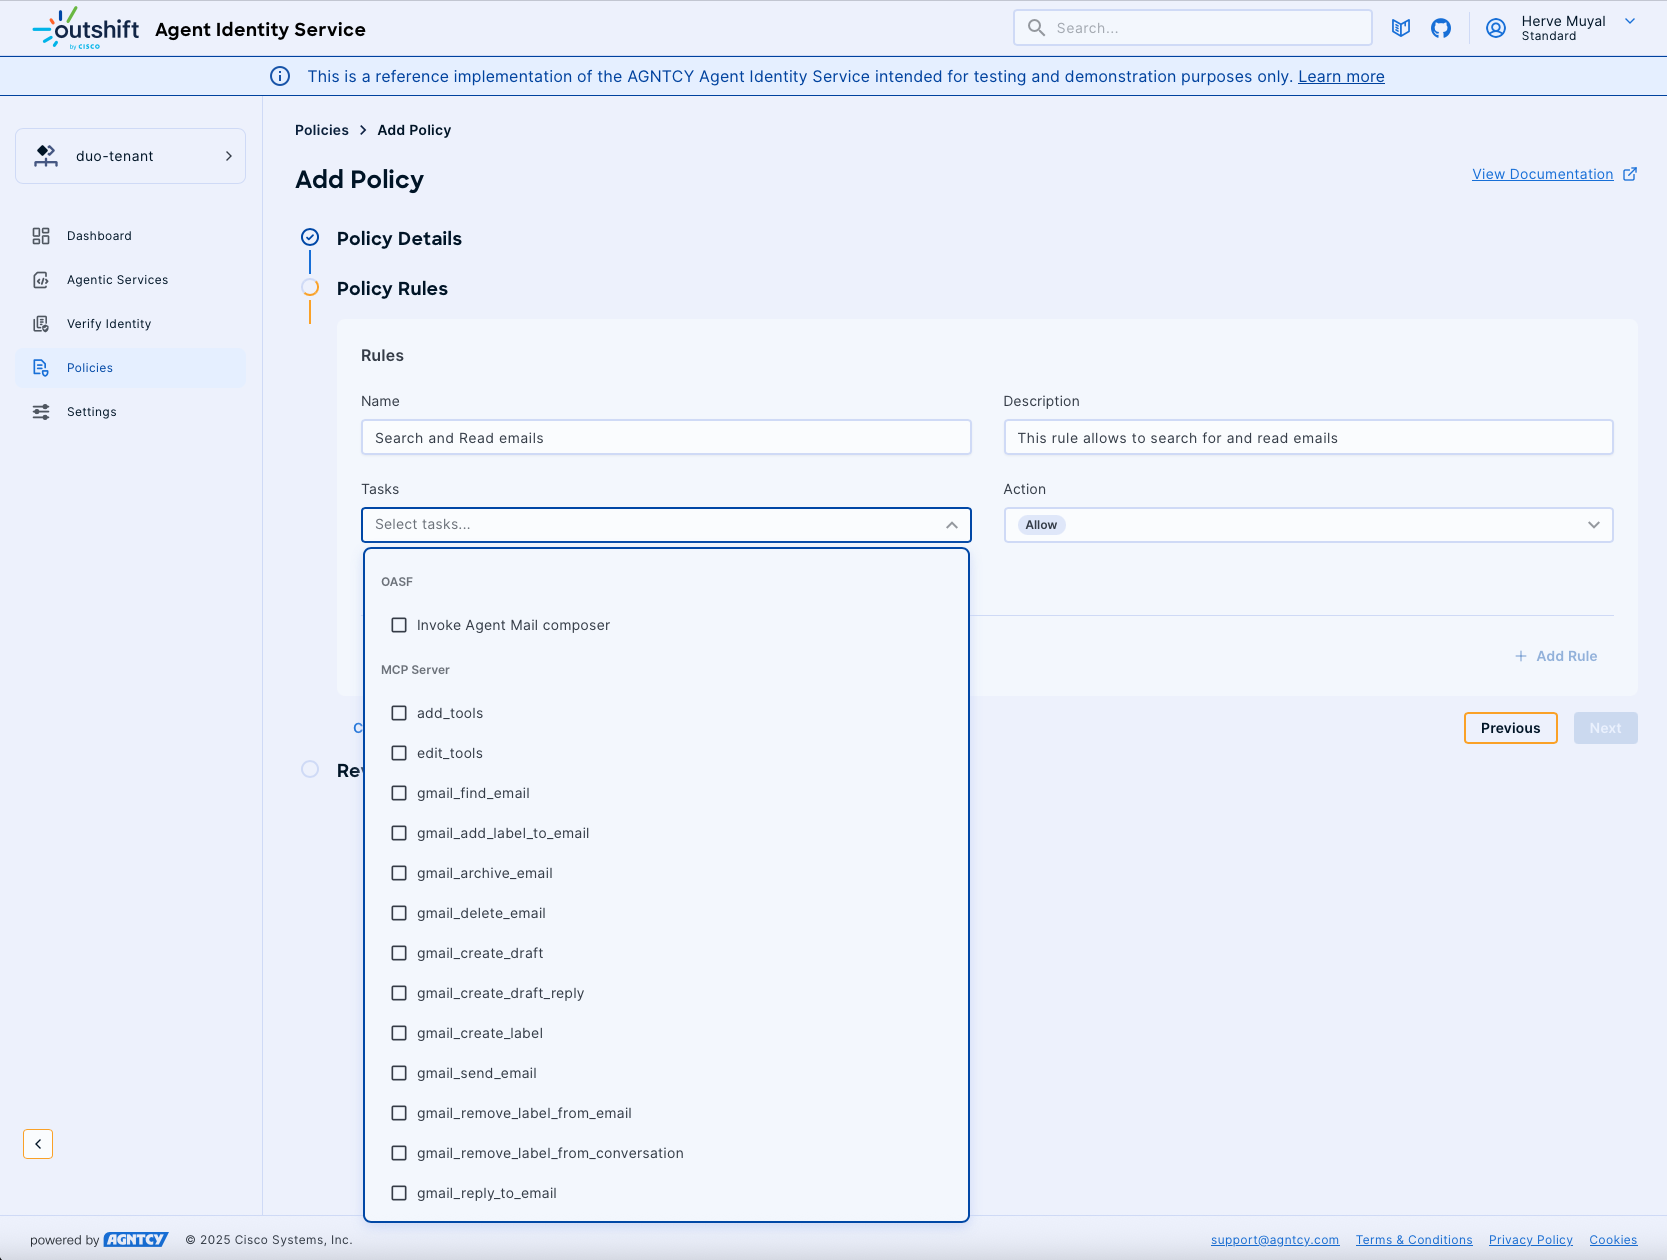
- Tasks: Choose the tasks this rule will allow or restrict (e.g., "gmail_find_email").
- Action: Select the action type, such as "Allow" or "Deny".
- Needs Approval: Optionally, specify if this action requires additional approval.
-
Add Multiple Rules:
-
You can add additional rules by clicking "Add Rule" and repeating the steps above for each new rule. This is useful for complex policies requiring multiple permissions.
-
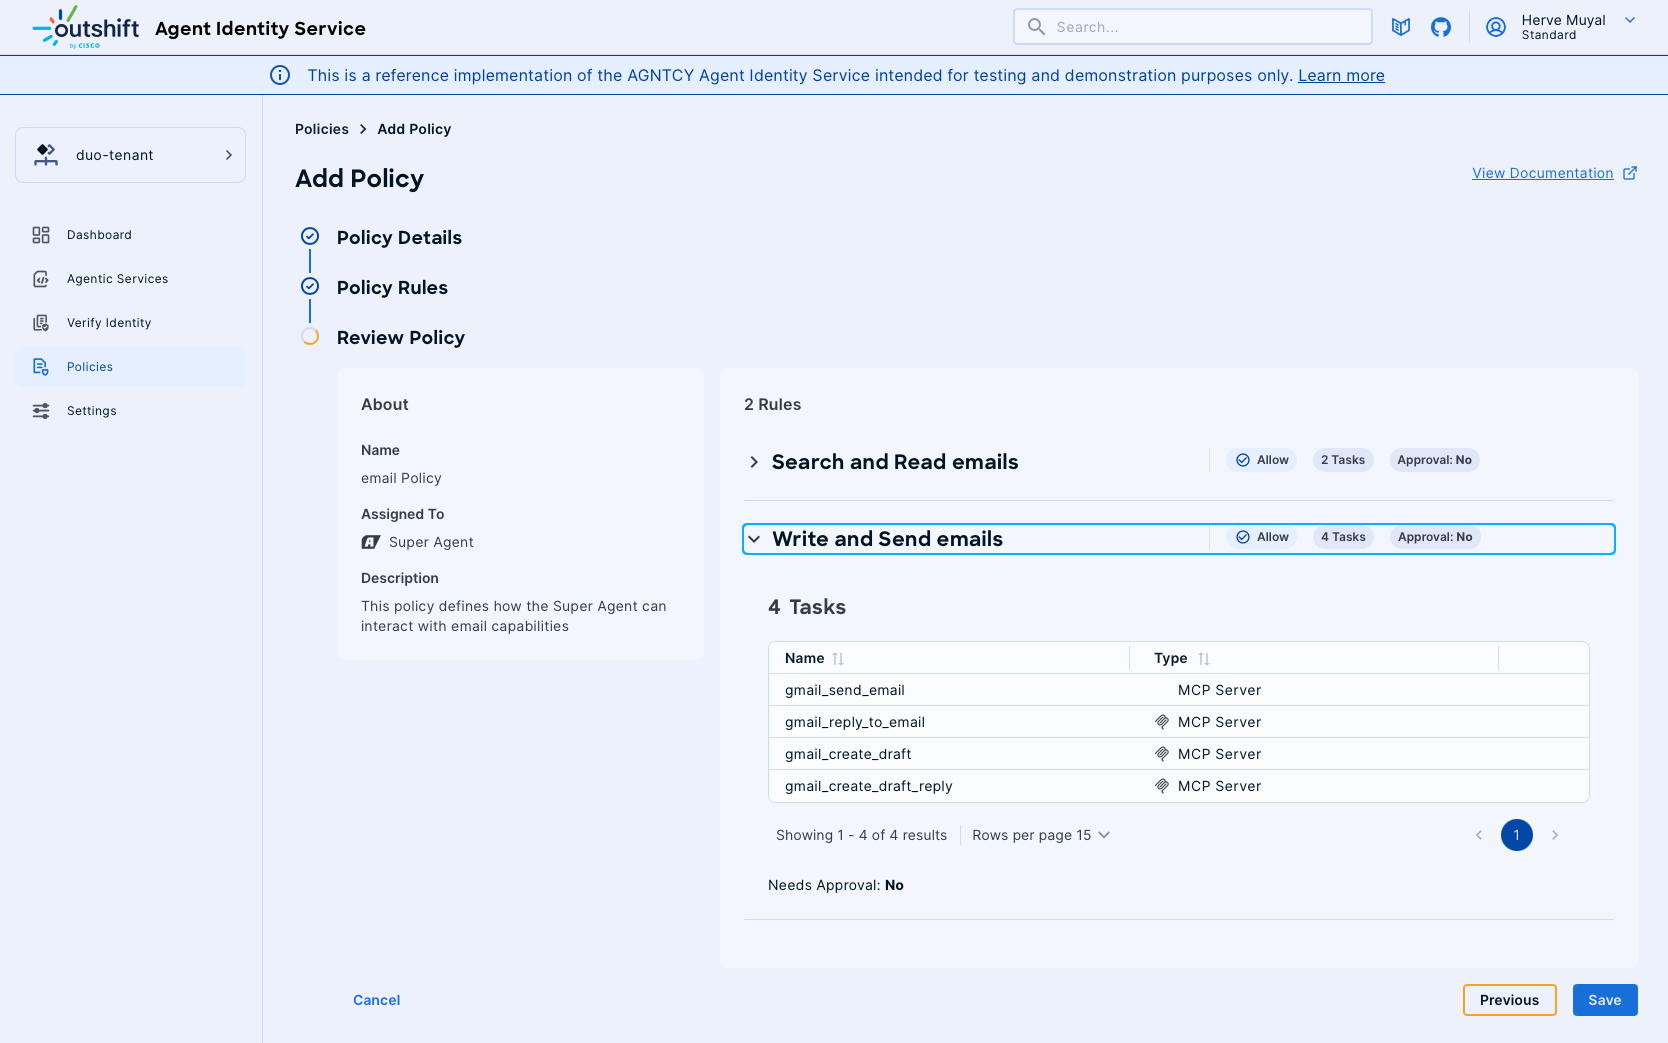
Review and Save Policy:
-
Review all policy details and rules to ensure accuracy. Once satisfied, click "Save" to finalize and save the policy.
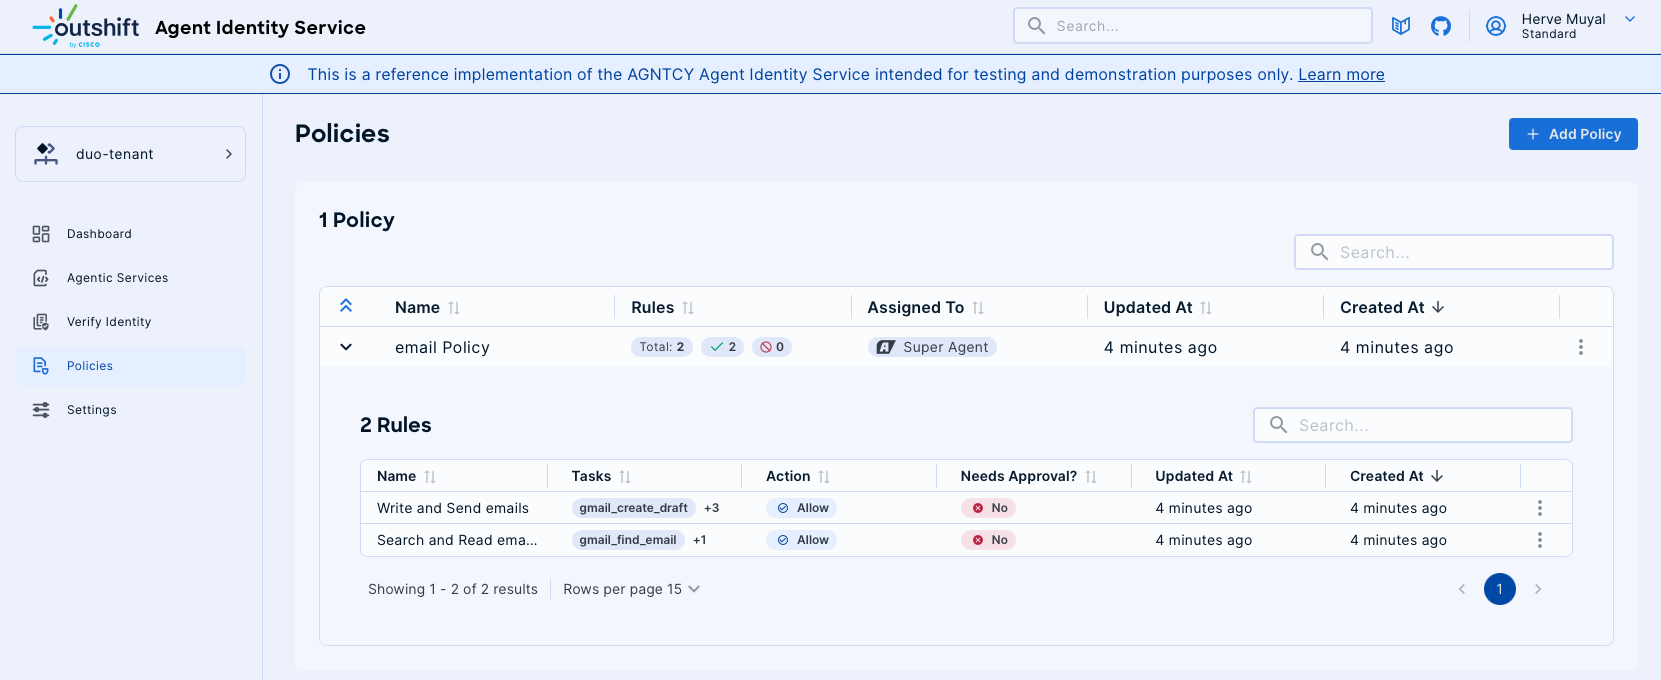
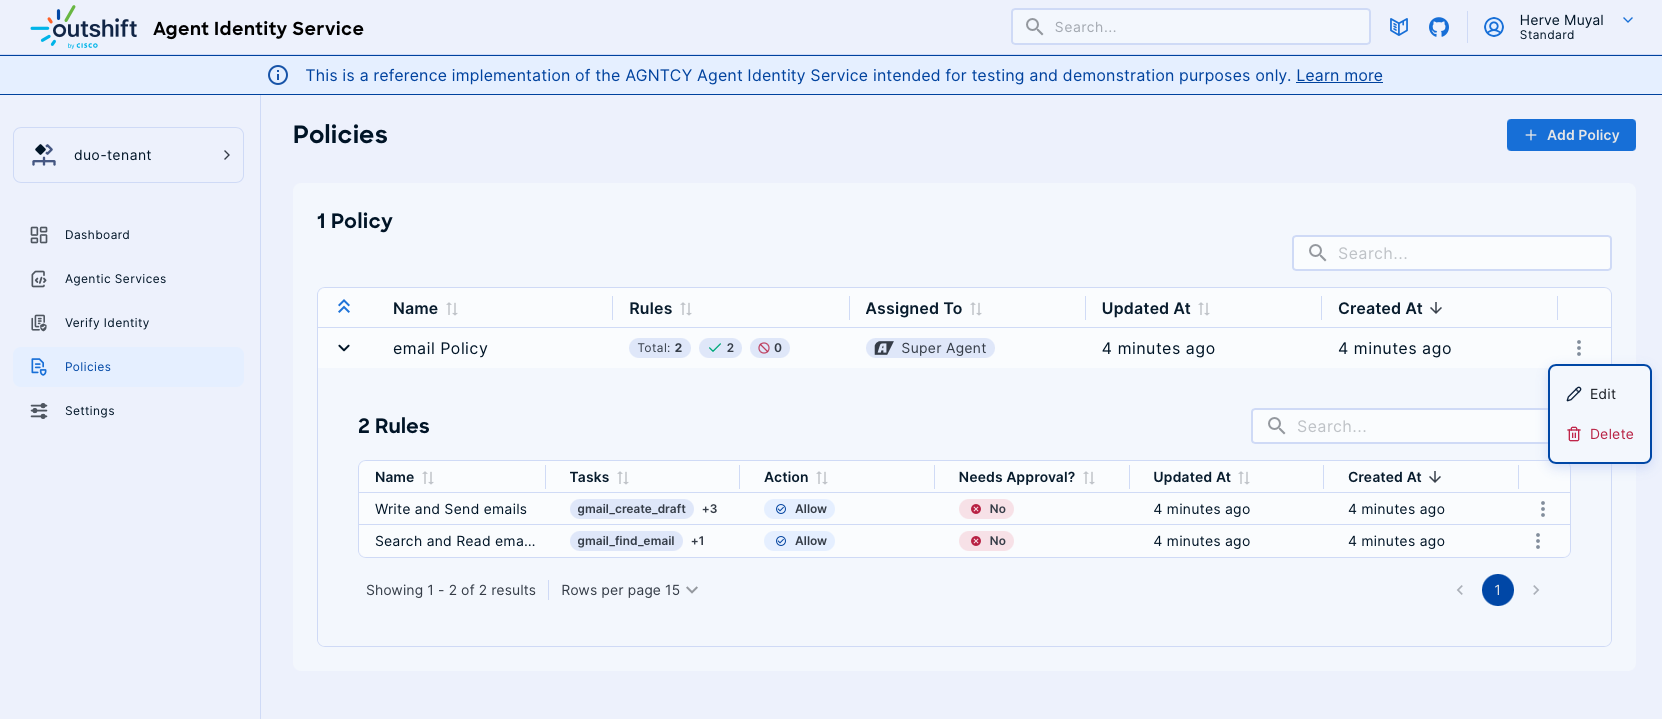
3. Managing Policies
-
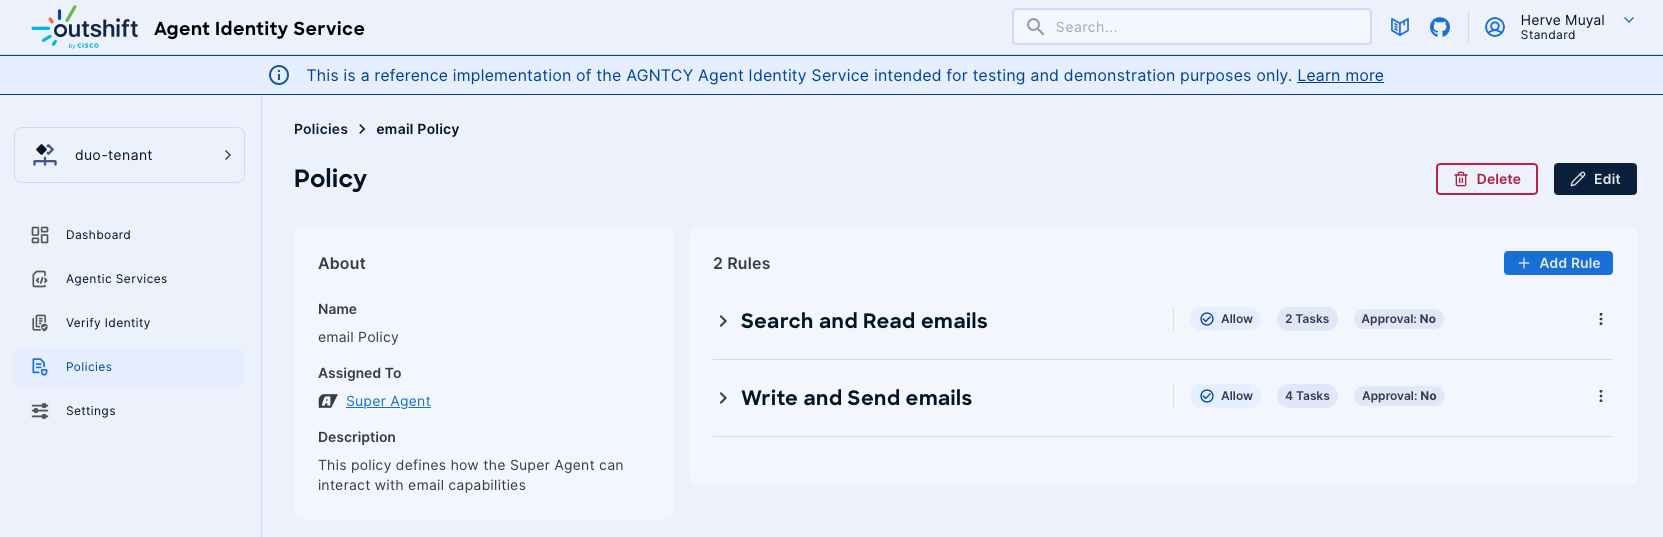
Viewing Policies:
- The Policies dashboard displays all existing policies, their assigned Agentic Service, and the creation date. Click on a policy to expand and view detailed rules.
-
Editing Policies:
- To modify an existing policy, select "Edit" from the options menu. Make necessary changes to details or rules, and then save.
-
Deleting Policies:
- If a policy is no longer needed, select "Delete" from the options menu to remove it from the system. Confirm the deletion when prompted.
Best Practices
- Regularly review and update policies to align with changing organizational needs and security requirements.
- Utilize the "Needs Approval" feature for actions with higher security implications to maintain oversight.